Friday, 20 June 2014

North African Green Tiger


Historical Background
Henschel's Panzerkampfwagen VI Tiger I design stretched back to 1937 when the Waffeanamt requested them to develop a Durchbruchwagen (breakthrough vehicle) in the 30 ton range. Before the prototype was completed, a request was issued for a Durchbruchwagen II, weighing 36 tons, with 50mmm frontal armour and mounting a Panzer IV turret armed with a short 75mm gun. Its development was also dropped in favour of the more advanced VK3001(H) medium tank and VK3601(H) heavy tank designs. In 1938, Henschel received permission to develop the two designs, the first German tanks to use the overlapping and interleaved Schachtellaufwerk main road wheels concept, which were already in use with the Wehmacht's half-track vehicles. Weighing 40 tons, it was to be armed with a 7.5cm L/24, or a 7.5cm L/43, or a 7.5cm L/70, or a 12.8cm L/28 gun and protected by 100mm, 80mm and 60mm of armour at the front, turret sides and hull sides respectively. Combat experience against the British Matilda I and II infantry tanks and the French Somua S35 cavalry and Char B1 heavy tanks showed a need for a better armed and armoured tanks.

In May 1941, Porsche and Henschel were asked to submit new designs for a 45-ton tank, to be ready for trials in June 1942. Porsche decided to update its VK3001(P) Leopard prototype while Henschel decided to update the VK3601(H) design as VK4501(H) H1 armed with a 88mm L/56 gun and VK4501(H) H2 armed with a 75mm L/70 gun. About a month later, during Operation Barbarossa, the German Army were shocked to encounter the superior T-34 and KV-1 tanks of the Red Army. An immediate revision of the requirements was made: weight was increased to 45 tons and armament was to be of the 88mm calibre. The design however did not include sloping armour and the deadline was shortened to 20 April 1941, which was Adolf Hitler's birthday. Both companies' designs made use of the same Krupp turret and were presented before Hitler at his HQ in Rastenburg. The Porsche design was rejected as its petrol-electric hybrid power unit was problematic and used too much copper, a strategic war material. The new tank was given the nickname 'Tiger' by Ferdinand Porsche.

The Tiger tank represented a new approach in German tank design by emphasising more on firepower and protection. The armour thickness was 100mm (hull front) and 120mm (turret front), the hull side plates were 60mm thick while rear and side superstructure and the turret rear and sides were 80mm thick. The Sherman tank's 75mm gun could not pierce the frontal armour of the Tiger at any range and need to be suicidally close (around 100 meters) to penetrate the side armour. The US 76mm gun can penetrate the side armour at 500 meters using M62 APCBC round and can penetrate the front armour at the same distance using the HVAP round (which were however always in short supply). Only the M3 90mm gun of the M26 Pershing and M36 Jackson plus the British 17-pounder gun firing APCBC round can pierce the frontal armour at a respectable 1,000 meters. On the Eastern Front, the 76.2mm gun of the T-34/76 and KV-1 have the same performance as the American 75mm gun against the frontal armour but able to penetrate the side armour at 500 meters using APCR rounds. The 85mm gun of the T-34/85 had better performance, able to penetrate the frontal armour at ranges between 200 to 500 meters while the powerful 122mm gun of the IS-2 can penetrate between 500 and 1,500 meters. The Tiger's main armament was the 88mm KwK 36 L/56 gun which was derived from the more famous 88mm Flak 36/37 dual-purpose gun. It has a high muzzle velocity and the projectiles were fired in a very flat trajectory. Aided by excellent targeting optics, it allowed greater first-shot kill probability.

The Tiger was powered by a Maybach HL210 P45 petrol engine developing 650hp at 3,000rpm but from the 251st Tiger, it was replaced by a 700hp Maybach HL230 P45. Even so, the Tiger was redlined at 2,600 rpm due to the inability of the transmission to hold up under the strain of transferring the power to a 56-ton vehicle. An engine governor was later installed, cappping the engine at 2,600 rpm and the maximum speed at 38km/h. The Schachtellaufwerk suspension system allowed a more uniform load distribution on the tracks, however it came at the cost of complexity and increased maintenance. For example, replacing a rubber tyre from an inner wheel require a removal of up to nine outer wheels. During the autumn and winter conditions of the Eastern Front, mud and snow could become packed between the roadwheels, which could then freeze, immobilizing the vehicle. presumably the German designers felt that the improved road performance, retaining mobility while having some wheels shot off and the extra protection was worth the trouble.

The Panzerkampfwagen VI Tiger Ausf E as it was officially known, were organized into independent heavy tank battalions, of which the Army's Schwere Panzer-Abteilung 501 and 502 were the first units set up. The Tiger entered operational  service with Schwere Panzer-Abteilung 502 in August 1942 and joined combat on 16 September 1942 at the Leningrad Front. The 501st was assigned to the North African Theatre, arriving there between November 1942 and January 1943 and first saw action near Terbouba, Tunisia on 1 December 1942. Based on these early engagements, the Tiger acquired a near-mythical reputation among the Allied troops facing them, despite their relatively small numbers. Fourteen Tiger I (the Roman nomenclature was added after the introduction of the King Tiger tank) commanders achieved more than 100 kills and the tank was forever associated with panzer aces SS-Hauptsturmfuhrer Michael Wittmann of the schwere SS-Panzer Abteilung 101 and Oberleutnant Otto Carius of schwere Heeres Panzer Abteilung 502. The Tigers served until the end of hostilities in May 1945.

1,355 Tigers were built from August 1942 until August 1944. The relatively low production numbers was caused by the complexity of the vehicle and the usage of expensive materials and labour-intensive production methods, and in turn, money. A Tiger tank cost more than twice the cost of a Panzer IV and four times the cost of a Sturmgeschutz III. Also, unlike most other German tanks, there was only one official variant, the Sturmtiger assault gun / self-propelled rocket launcher.

The Kit
Tamiya's 'modern' family of 1/35 Tiger kits began 1989 when they released a late production Tiger. Since then Tamiya has come out with various reboxings of the original kit and then worked backwards in releasing their Tigers. In 1997 they released the kit of an Early Version Tiger and a year later came out with this kit. The parts were moulded in dark yellow and were spread among six sprues, a lower hull, two cementable flexible plastic tracks and a small decal sheet. There are no PE parts included although a set of PE grills were available separately. The parts in this kit are actually the same with those in the Early Production kit but with additional parts to make the initial version supplied to Rommel in North Africa, such as fenders, early version of the Feifel air cleaners, tropical exhaust covers and early mantlet. A commander's figure in a relaxed pose is included. The decal sheet provides markings for four 501st Abteilung vehicles with its distinctive large turret numbers.

Construction
To begin with, the suspension arms were cemented onto the lower hull. Each arm has a smaller location tab so that all of the suspension arms would be of the same angle. The rear plate and the final drive covers were then cemented with no major issues (there is a slight gap at the rear plate but easily filled). Then came the most tedious part of this built - the wheels. Sixteen sets of wheels needed to be assembled and because the Schachtellaufwerk suspension system may cause problems with painting, the wheels were painted first and then set aside. In the meantime, I moved on to the upper hull. The front armor plate and its assocociated parts were assembled and cemented onto the upper hull/hull roof. The  kit did not include PE mesh screen for the engine deck but luckily the local Tamiya stockist at the time (this kit was actually built several years ago, when the Malaysian rights for Tamiya distribution was held by Daisheng) had one which was dutifully grabbed by me.

I did not realise it at the time but I forgot to install Part A22 after supergluing the PE mesh! At least that area would be partially hidden by the tow cables and perhaps I could hide it further with some accessories..... The hull roof was then cemented onto the hull and was followed by the glacis plate. But before attaching the latter, holes were made into it in order to accommodate the shovel. Two further holes are also needed to be drilled (for the headlights) if one is building either marking options A or B. I then returned to the lower hull, first painting it and then cementing the interleaved wheels into place with the exception of the outermost wheels (parts B6).

Moving to the rear of the hull, Step 7 involved fitting the exhausts, towing eyes and the rear fender. The last was left off until the tracks were fitted. Next were the Feifel air pre-cleaners. The main part of the system was made from two halves, resulting in a seam that was difficult to remove. The tubes leading in and out of the canisters were cemented on the canisters. The latter were then dry-fitted onto the model to check the position of the tubes (the tubes have keyed tabs, but I did it just in case). Step 9 was skipped partially as the jack and the spare tracks would be added after painting. Returning to the Feifel system, I cut the provided vinyl hoses using the templates in the instruction sheet. The hoses have details that replicate the original items nicely and have good fit - I did not superglue them as instructed. The completed assembly was then cemented onto their places. This was followed by attaching the exhaust shields and hose guards. Finally the hatches, headlights and the front towing eyes were cemented before I moved on to the turret.

The mantlet was assembled first and Tamiya includes a rudimentary breech for the main gun. The turret halves were then mated together, along with the mantlet. There were seam lines at the front and the back, but were no big deal. The turret roof was the cemented, also with no fuss. Purists however might want to add welding beads along the edge of the roof. The two-piece gun barrel was cemented and, with care, no seam would be visible. Mine did but I add Tamiya Extra Thin Cement, and press the halves tighter. The resulting ooze, once dry, was trimmed away with a sharp hobby knife. The commander's cupola was assembled, also with seams at its bottom. To finish the basic build, the loader's hatch was also cemented in the closed position.

Painting and Decaling
The model was then painted Tamiya XF-60 Dark Yellow with some XF-64 Red Brown added to simulate, more or less, the brownish yellow colour which the Tigers of the 501st were painted in. I then chose the markings for tank 731 / 'Norbert'. The decals have good colour registration, yet they were thick - thick enough that the edges of the carrier film was quite visible. The model then was then completed in the usual manner. Anyway, after a number of years, I was intrigued by online discussions of the Tiger I in North Africa, specifically its colours. While many are of the opinion that the Tigers were painted the normal Afrika Korps colours, others argued that it was painted brown, and most intriguingly, green (at least on some of the Tigers). Well, not dark green but pea green or even captured olive drab. Interested by this line of argument, I decided to repaint my Tiger. After stripping the decals and removing the pioneer tools, I used Tamiya's instruction in their 1/48 Tiger kit as a guide, by mixing equal parts of Tamiya XF-60 Dark Yellow and XF-58 Olive Green (although I think there is slightly more XF-58 in the mix). I have to admit that it looks weird for a Tiger to look greenish instead of panzer grey and/or the predominantly dark yellow camo scheme. For the new markings, I chose '813', however, I have lost the stalking tiger insignia of the 501st, making the markings for '813' less than complete. The large decals were then subjected to a virtual bath of Mr Mark Softer in an attempt to draw them down to the model's surface. The model was then subjected to the usual wash process.

Finishing
To begin with, the one-piece tracks were painted XF-64 Red Brown and set aside to dry. In the meantime, pioneer tools were painted XF-59 Desert Yellow and Gunze 28 Steel. The towing and track repair cables were painted XF-56 Metallic Grey. The tracks were then looped and glued using superglue. To place the tracks, I first looped them over the already-assembled suspension units, then the still loose sprocket wheel was placed in the loop and the tracks were stretched until the sprockets engage the holes in the final drive housings. The outermost wheels were then cemented and the upper run of the tracks superglued to the wheels. While they look OK, the drape of the tracks can't beat workable aftermarket tracks such as from Friulmodellismo or Modelkasten. The pioneer tools were then cemented on their places. On the rear plate, the jack was placed onto into its place, I however decided not to add the spare track links. The holes were sealed and the paint re-applied.

Afterwards it was time for weathering. The tracks were first subjected to AK Interactive's Track Wash solution. I found that it worked all right although I later found out that it works best if the track was base painted in light colour, such as Tamiya XF-57 Buff. The tracks were then drybrushed silver at the raised areas. Finally, Mig Productions Gulf War Sand mixed with enamel thinner was liberally applied to the lower hull and tracks and once dry, the excess was removed using old, stiff brush. A length of brass wire was cut and glued to the aerial base. Finally, to finish the build and to hide my omissions, an 88mm ammo crate from Academy and two jerrycans from AFV Club (the latter were among the best I have ever seen, IMHO) were placed onto the rear deck.

Conclusion
In short, another great kit from Tamiya. Virtually all the parts fit perfectly and amount of detail included is adequate for an out-of-box build. My gripe with this kit was the thickness of the decals and the separately available engine deck grilles, especially the latter. Later, I found that Terry Ashley of the Perth Military Modeling Site in his review of this kit's 1/48 brother pointed out that all of 501st Tigers have their headlights located on the glacis plate. So, retrospectively, Tamiya got their instructions wrong for '731' and '813', but I think I can live with that. I highly recommend this kit, especially to those who got intimidated by the more complex kits offered by Tamiya's competitors.   

Tuesday, 10 June 2014

Stalin's Sledgehammer


Historical Background
In November 1942, the State Defence Committee, after noticing the effectiveness of the German Sturmgeschutz assault gun, ordered the construction of assault guns for infantry support. While the SU-76, with a ZiS-3 76.2mm gun and the SU-122 with a M30 122mm howitzer were adequate for the task, Operation Uranus, the Stalingrad counteroffensive showed that the Red Army needed mobile heavy guns to smash German fortifications. During the operation, the Red Army still relied heavily upon towed guns which lack mobility and exarcebated by the snowy and muddy conditions, especially the heavy 152.4mm howitzers. The guns were also vulnerable to counter-battery fire and incapable to cross rivers, unless using bridges. The Red Army did have a self-propelled heavy artillery, the KV-2, armed with an M-10 152.4mm howitzer but it's silhouette was too high (consequently with a too high centre of gravity), sluggish manual turret traverse and a slow reload rate. The Committee specified that the new self-propelled was to be armed with the ML-20 gun-howitzer mounted on a casemate-style superstructure. In December 1942, three designs were submitted to the Committee, all using the KV-1S tank chassis. The design submitted by Iosef Yakovlevich Kotin was chosen for mass production. The project was designated KV-14 and started production in February 1943 at the Chelyabinsk Kirovski Zavod (ChKZ). The designation was later changed to SU-152.

Analysis of the combat performance of the SU-152 showed a need for newer model, based on the IS tank chassis. Development began in July 1943 under the designation IS-152. Trials commenced in September 1943, revealing a number of shortcomings. In October of the same year, a second variant, designated Obyekt 241 was ready. In November 1943, Obyekt 241 was accepted for production under the designation ISU-152 and in December 1943, ChKZ stopped the production of the SU-152 and replaced it with the ISU-152. Production soon went into full gear, causing a surplus of hulls which were armed with the A19S 122mm gun, creating the ISU-122. The ISU-152 followed the same design of other Soviet self-propelled guns - fighting compartment at the front and the engine and transmission to the rear. The crew was made up of five persons - driver, loader, gunner, lockman and the commander. The gun was the same with the SU-152 : the ML-20S 152.4mm gun-howitzer. Close-range self defence armament consist of a pair of PPSh-1941 sub-machine gun and 20 grenades. A 12.7mm DShK heavy machine gun can be placed by the right forward hatch for AA defence and also against enemy tank-killer squads. Because of the size of the ammunition, only 20 rounds can be stowed inside the vehicle, usually consisting of 13 HE and 7 AP/Concrete Piercing rounds.

The ISU-152 can be used for three roles: heavy assault gun, heavy self-propelled artillery and heavy tank destroyer. As a heavy assault gun, it was extremely useful for close-quarter, urban combat operations. The thick armour (sloped and 90mm thick) made it impervious against most German anti-tank guns while the heavy, high explosive rounds were excellent against enemy fortifications. The ISU-152 can also be used in the indirect fire role for preparatory or support bombardments despite the low rate of fire and medium firing range. Finally, while not specifically designed for the role, it can act as a heavy tank destroyer. In this role, it inherited the Zveroboy (animal killer) nickname from the SU-152, for its ability to destroy the heavy 'animal' German armoured vehicles (Tiger and Panther (later joined by the King Tiger) tanks and the Elefant tank destroyer). Although the gun has a low rate of fire and the 152.4mm shell is of low velocity, its heavy charge has sufficient blast effect to blow even a Tiger's turret off. Although generally unable to penetrate armour, the concussive effect causes the interior of the target tank to spall, killing and injuring the crew. While AP rounds were developed, it was not a great improvement over the regular HE rounds. To compensate for the low rate of fire, the ISU-152s used ambush tactics with some 4 to 5 vehicles firing in salvo against a single target. The ISU-152 was used all over the Eastern Front and was especially useful when smashing the fortress cities of Konigsberg, Budapest and Berlin. The vehicle was also used to crush the Hungarian Uprising of 1956 and was probably used as late as 1991 by Iraq during the First Gulf War. A total of 3,242 vehicles were built between 1943 and 1947 and many were exported to Soviet satellite and client states.

The Kit
In the 1990s, Dragon issued a number of IS tank-based model kits, from the IS-1 gun tank to ISU-series assault guns. Kit #6803 Chinese JSU-152 Howitzer was based on its baseline ISU-152 kit and was issued under their 'Korean War Series'. I did not have the opportunity to inspect the original release, but I believe that the contents of both boxings are actually the same. The parts are well-moulded and and generally have good detail. The engine deck screens are however moulded solid and have no PE alternative (save for aftermarket ones of course). The tracks are of single link type and being a 1990s kit, need to be cut off their sprues and cleaned up before assembly and painting. The ISU and IS series have two types of tracks, one being with guide tooth on every link and the other with guide tooth on every other link. For this kit, Dragon provided the former.

Strangely, Dragon did not include parts for the DShKM 12.7mm AA MG. Sure, not all vehicles were fitted with it but I think it should be included as an option. Regarding accuracy, the kit actually included a mish-mash of features from early production to post-World War 2 vehicles. However, internet websites and online forums provided advice and pointers in order for modelers to accurize their kits. And, being of the same mould with the rest of Dragon's IS series, the kit suffers from undersized roadwheels and too low a hull. The kit provides five marking options, and rather strangely, despite its title, only one of the markings is for a PLA ISU-152:
- Chinese PLA Artillery Regiment, 1951
- Guards Heavy Assault Gun Brigade, near Berlin 1945
- Third Baltic Front 1945
- Polish LWP 13th SP Artillery Regiment, Warsaw 1945
- Soviet Heavy Assault Gun Brigade, Berlin 1945

Construction
As the normal practice for AFV kits, construction starts at the lower hull. But first, two sets of idlers, two sets of sprocket wheels and 12 sets of roadwheels have to be assembled. The suspension arms fitted nicely into their slots although I still have to lay the lower hull flat on the table to ensure that all the wheels would touch the ground. Afterwards, all the wheels were cemented, with the exception of the sprocket wheels, which remain free. Holes were cut into the front plate to accommodate the spare track links - a rather tedious work as the plastic was quite thick (holes were also made into the upper hull, which is thicker than the lower hull). The lower hull was then painted and set aside for a while. The track links were painted on the sprue and once dry, were cut off them, the paint retouched and were put into a container. The assembly of the links however took some time as they have too tight a fit and I had to sand / file the mating surface for a better fit. The IS series of vehicles have notable sag of their tracks and to achieve that, after laying the upper run of the tracks, I simply push the tracks down at the appropriate locations once the cement were nearly dry. As stated before, Dragon's hull is too low and should be raised by 1.5mm using plastic strips. Lacking the necessary items at the time, the hull was left as it is.

Moving on to the upper hull, Dragon rather bafflingly instructed the modeler to drill two holes for the gun travel lock....appropriate for the turreted IS tanks, but not for the ISU with its casemate-mounted gun (how the hell the crew is supposed to turn the gun around?), so I skipped off this task. The engine access hatches  were moulded in situ; nothing wrong with that but I think the engraved panel lines were too fine. The grills were also moulded on and are best replaced with PE replacements. I also fit all the external fuel tanks. Each was made of six parts (main body halves, ends and two pylons) - there is a visible seam between the halves and need to be cleaned up. All of the hull fixtures and fittings were also fitted, save for the pioneer tools. The tankovy desant rails were cemented at this time but I discovered, too late, that the foremost pair of handrails were actually a post-World War 2 addition and were only suitable for the Chinese marking option. Yes, I can simply cut them off and sanded the stub but I decided not to. The gun assembly was next. Together with the upper hull, there is no interior detailing, not even a rudimentary breech. The big gun mantlet feature respectable cast pattern, although lacking the casting numbers.The barrel is a two-part assembly, and with careful alignment, can be mated together without a seam line. The upper hull assembly was then mated to the lower half, and the low hull of the Dragon kit became immediately apparent when there is hardly a room between the track guard/sponson and the track itself, especially at the return rollers and the sprocket and idler wheels.

Painting and Decaling
The model was painted in Russian Green, made from a mixture of Tamiya XF61 Dark Green, XF2 Flat White and XF3 Flat Yellow. Chipped paint were then added selectively using XF61 Dark Green. For markings, I was split between two options - the second with number 65 and the slogan 'Liberated Kirovskaya' or the third, with number 25 and slogan 'Death to German Occupiers' (I think). I eventually settled for the latter, as it includes a drawing of an arrow-pierced heart. The decal has somewhat yellowed with age but still good. The model was then subjected to a black-brown wash process.


Finishing
The remaining parts, such as the pioneer tools and the spare track links were cemented onto the model. I also robbed the DShKM heavy machinegun from my old Dragon IS-2 kit, and fit it on the right side of the commander's hatch (my IS-2 actually do not need it as photos of the real tank '414' show that it was not fitted with the weapon). This was followed by the remainder of the weathering process. The tracks were given a wash of red brown-black mix, a bit thicker this time. Once dry, the tracks were subjected to silver drybrushing. Afterwards Mig Productions' pigments were applied in a slurry all over the model - thicker on the lower hull and the running parts and lighter on the rest of the model. I used a mixture of Rubble Dust, European Dust and a bit of Gulf War Sand. When dry, the excess was removed using a stiff brush. Tamiya Weathering Master Rust and Soot were applied onto the exhausts and X19 Smoke was applied onto the external tanks and the rear deck.

A figure from MiniArt's Soviet Tanker At Rest was used to round up the build. While assembling the figure, I noted that there is an extra part not mentioned in the instructions. After scratching my head for a while, I realized that the said part is actually the left sleeve of the tanker's overall! I could not find where it should be cemented to (yes, I know, the left shoulder of the overall, but exactly where as the figure is in the act of putting on the overall). Google came to the rescue after I searched for pics of completed figures. The figure was then painted using acrylics but somehow my paint mix for his uniform went wrong and it dried with a slight sheen....hmphhh!!!

Conclusion
Despite being overtaken by Tamiya's JSU-152 kit, the Dragon version can still hold its own. Sure, it was dimensionally less accurate than the contemporary Zvezda offering but the finer surface details made up for it. After all, it's shortcomings are not really a deal breaker as they can be overcome with minimal work. While the roadwheels were undersized, they were not grossly so and can be safely ignored. I however find some omissions annoying, such as the lack of the AA MG and tow cables. A good substitute for the Tamiya kit with a lower price. Dragon has also tweaked the kit, increasing the height (although the original roadwheels remain) and use their Magic Track track-link concept in their 3-in-1 ISU-152/ISU-122/ISU-122S kit.   

Friday, 23 May 2014

Lightweight Warrior


Historical Background
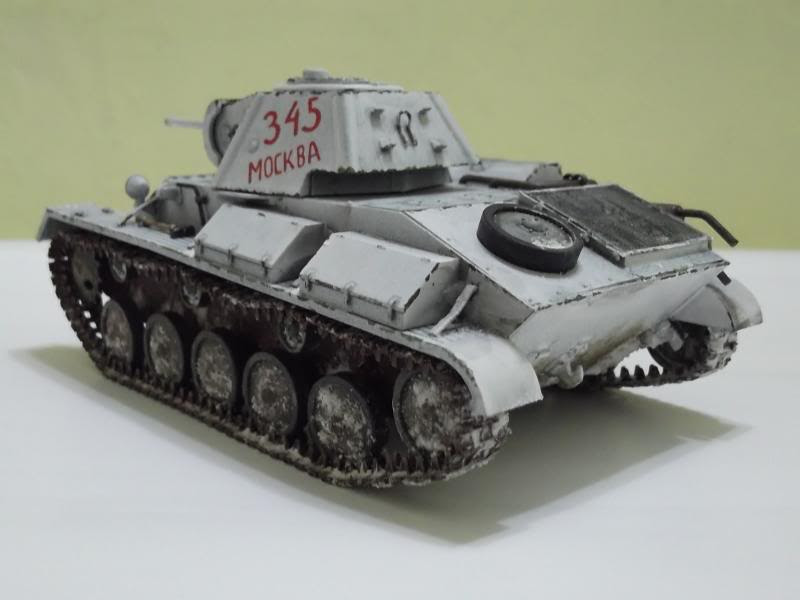
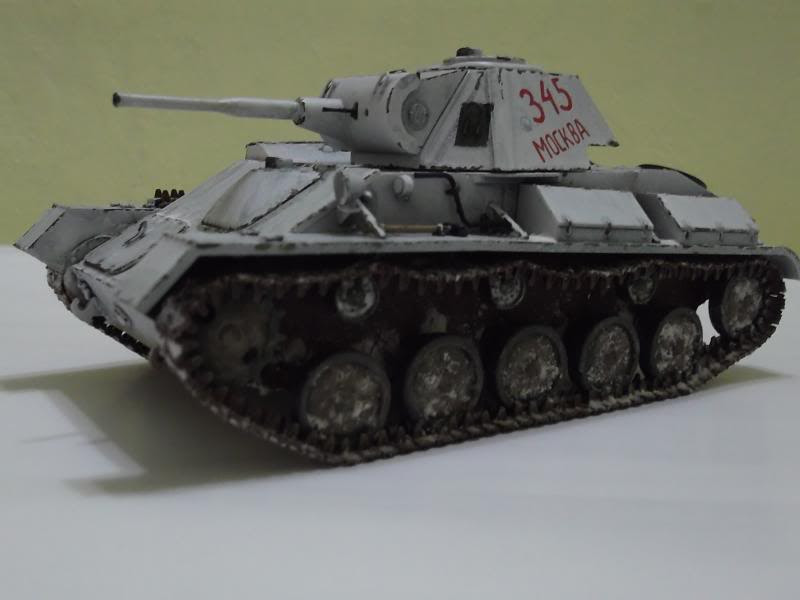
At the outbreak of the Great Patriotic War in June 1941, the Red Army possessed large numbers of light tanks even though events up to that time pointed to the general weakness of the type. Wartime experience eventually cause the final decline of the light tank, but until 1943, it remained a significant part of the Red Army's inventory. This was caused by a number of reasons: firstly, to make up for the catastrophic losses in 1941 and 1942, as any tank is better than no tank, or as Stalin put it : "Quantity has its own quality". Secondly, it was cheap and easy to produce, and finally, because of its inherent simplicity, it can be built at less specialised factories especially at the time the major tank manufacturing plants were being relocated to the East, disrupting the production of the more capable T-34 and KV series. Once the factories have been re-established, the more powerful and battle-worthy tanks were preferred. This, coupled with the increased protection and firepower of the German panzers caused the role of the light tanks to steadily decline and production of the last type, the T-80, was ended in autumn 1943.

Before 1941, the Red Army was equipped with a number of models of light tanks, from the reasonably armed T-26 to machine gun-only armed T-37 family. In 1941, after facing the disastrous losses at the hands of the Panzertruppen during Operation Barbarossa, Zavod No.37 under the guidance of its head designer, Nikolai Astrov, produced the T-60 light tank. While better in many respects than the earlier T-40, it was still armed with a 20 mm cannon, a weapon totally inadequate against the Germans' Panzers III and IV, especially when used as a combat tank. It was so bad that it was nicknamed 'A Brother's Grave For Two'. In an attempt to remedy some of the shortcomings of the T-60, Nikolai Astrov designed a new light tank with a more powerful armament, a more robust armour and greater mobility than the T-60. The new tank, designated T-70 was put into production in March 1942. The first batch was built with a GAZ-202 engine on each side of the hull , each powering one track. This was seen to be a serious defect and was quickly redesigned as T-70M with the engines in-line on the right side of the tank. The turret was redesigned so that the armour plates can be easily welded together and was moved to the left side of the hull. The T-70 was built at Zavod No.37 and No.38 at Kirov and GAZ at Gorky.  While the ZiS-19BM 45 mm gun and 45 mm of frontal armour were improvements over the T-60, the better armament of German tanks such as L/60 50 mm gun of the Panzer III and L/43 75 mm gun on the Panzer IV negated them. Furthermore, the T-70 was still equipped with a one-man turret, overburdening the tank commander, who also has to act as the loader and the gunner.

The T-70 participated in numerous battles but none bigger than the Battle of Kursk. On 12 July 1943, at a front 32km wide in front of the village of Prokhorovka, 429 panzers of the II SS Panzer Corps and III Panzer Corps clashed with 870 tanks, including 261 T-70s, of the Soviet Fifth Guards Tank Army. A report by the 5th Guards Tank Army on 16 July 1943 listed 89 T-70s as total losses with another 56 still under repair. Following the battle, the T-70 were gradually withdrawn from combat and were relegated to secondary duties. The T-70 was further developed into the T-80 but interest in light tanks had waned and only 120 were built. The T-70 also formed the basis of the SU-76 self-propelled gun and the prototype-only T-90 anti-aircraft tank. In all, 8,226 T-70s were built.  

The Kit
MiniArt, from Ukraine, has come out with a number T-70 kits : T-70 Early production (with figures), T-70M Late production with figures, T-70M with ZiS-3 76.2mm gun (with crew) and PzKpfW T-70 743(r) with ZiS-3 (with crew). The 'Special Edition' is the latest of the T-70M gun tank kit, it came without any crew figures but have a PE fret not available with the other boxings. Also both early and late versions of the T-70 can be build from this kit. The kit consists of 356 parts in light grey and clear plastic and also PE. 176 of those parts are the separate link tracks - they look nice but have ejector pin marks on either side of the inner face. The rest of the parts are well moulded and have no flash.

For those uncomfortable with PE, there are original plastic parts to use but, of course they have less detail and look less realistic. The decal sheet was printed by Begemot and feature markings for nine tanks, mainly from that most famous of military formation in scale modeling : 'Unknown Unit' (Haha!). My previous experience with Begemot decals was very positive and I have no doubt these would work well too. The instruction sheet was printed on gloss paper and the drawings somewhat reminded me of Bronco kits. Apart from the usual construction steps, the instruction sheet is also needed for locating parts numbers as none were moulded on the sprues.

Construction
As with many AFV kits, the MiniArt T-70 is also conventional in its build approach. As usual, the hull received the first attention although MiniArt deviated slightly by having you build the upper portion of the hull first. Me, being a traditionalist, started with the one-piece lower hull. Once all the suspension arms were in place, I have to set the lower hull flat on the modeling table to ensure that all of them were in alignment. Moving on to the upper hull, I first cut a hole in the engine compartment, in order to use the PE parts. The resulting hole was then cleaned up and I installed the PE vent flaps (or whatever it was called). They were then painted steel, along with the compartment on the right-hand side. Then the PE grilles were superglued onto their places. Having already decided beforehand to build a late production vehicle, I used the indicated parts to assemble the driver's hatch. Afterwards, the rest of the hull parts were cemented, save for the spare wheel, exhausts parts, track guards and all the on-vehicle equipments.

The turret assembly were next. MiniArt provided no interior detailing save for the gun breech, co-axial machine gun, gunsight and periscope. Like the driver's hatch, there were different mantlet covers and periscope hatches for early- and late-build vehicles. The co-axial MG barrel was delicate and care was needed in handling it. The turret's interior was painted XF-71 IJN Cockpit Green. Then it was assembled and set aside. As the kit included PE parts, the partially assembled model was sprayed with Tamiya Grey Surface Primer.


I intended to build a vehicle in winter and to ease the weathering process, I decided to weather the hull before attaching the tracks. To create mud, I used modeling paste mixed with water, Mig Productions' African Earth pigment, Tamiya XF-64 Red Brown, along with fibre from a broom (I'm a cheapskate, plus the fibre resemble static grass) and dabbed them all over the lower hull. When dry the 'mud' went lighter so I haphazardly add some more Tamiya XF-64 over it. The wheels were mounted onto their places with some difficulty as the fit was quite tight. Then it was time to assemble the tracks. The tracks are well-moulded with good detail and, as stated before, with ejector pin marks on the inside surface. The tracks were sprayed Tamiya TS-1 Red Brown, cut off their sprues, cleaned and placed inside a plastic container prior to assembly. It should also be noted that the track links are quite fragile and I broke several of them, necessitating repairs as there were only 7 spare tracks (there were 84 links per run with a total of 168, MiniArt supplied only 176 links). Although non-workable, the tracks assemble easily using Tamiya Extra Thin Cement. Looking at photographs, some show that the tracks sag on the upper run while others showed them to be rigid. I decided to go mid-way, by only having a slight sag.

Before adding the track guards, I decided to weather the upper run of the tracks first, as there is only a little room between the track and the guard. Once done, the track guards were cemented into place. The left hand guard was slightly bent so I used superglue at the particular area. The track guards have reinforcing bars, four per side. Like the tracks, the bars are quite fragile and I broke three on the left side before deciding to cut the off the sprue using my hobby knife instead of the cutter. Finally, the storage boxes on the left track guard were glued. MiniArt provided delicate yet well detailed PE hinges and clasps...but I chickened out and left the boxes as they were. 

It should also be noted that the instructions mislabelled some parts and a few other parts were not called for in the instructions. Parts D15 were labelled as D14 while Part D2 was simply illustrated as being on the back of the turret without any instructions to put it there.

Painting and Decaling
For kit markings, I chose #8, a late production T-70M, Eastern Front, Kharkov, Winter 1943. The tank was painted white overall save for two patches on the turret sides and the lower hull. For the base colour, I used Tamiya XF-67 NATO Green, painted without taking into account scale effect. Although originally thinking of applying the 'hairspray method', I decided to simulate an early winter white camo - not yet washed out but having chipped at the edges. The hairspray method can of course be used for this course of action but I decided to micro-paint the exposed inner layer. After masking, the model was sprayed Tamiya TS-1 Matt White. Once dry, the masking was removed and and using the smallest brush I have, I repainted the NATO Green in irregular dots and dashes on the edges. Once dry, the decal was applied - just two of them, the fastest in my hobby so far!

Finishing
The remaining parts are now cemented onto the model. The pioneer tools were first painted XF-59 Desert Yellow for its wooden parts and Flat Black for the metal parts. The metal parts were then 'metalized' using graphite. The same treatment was done to the co-axial machinegun. The exhausts were painted burnt iron and later were coated with Tamiya Weathering Master Rust. The spare wheel was affixed to its place. Even though the instructions seem to suggest that two wheels were to be placed, it seem that only one was needed, based on the rest of the instruction diagram. Once all the parts were in place, the model was subjected to the washing process. This time however instead of black-brown, I used a blue-black mix.

Once dry, I applied Tamiya Weathering Master Snow randomly and haphazardly, suggesting an uneven wear of the whitewash paint. I then mixed a bit more of the mud mixture and dabbed them on the wheels and the lower front and rear hull and used Tamiya Weathering Master Mud to blend the colours. Next, for snow, I mixed baking powder with water and white glue and dabbed them on the tracks and parts of the hull. The excess was removed from the more obvious places such as track joints. No figure was included in this built as there were none provided in the kit and those in my stash were more appropriate for warmer months of the year. However I may include one in the future, so the turret hatch was cemented just enough for it to stay in place but can be easily pried open when needed, And that concludes the built.

Conclusion
This was my first MiniArt kit and I can say that I'm very pleased with it. Yes, there were some problem such as the fit of the wheels, the fragility of the track links and missing labels and pointers in the instructions but the experience was generally a positive one. The inclusion of the PE parts gave better details for this particular release, although I negated it somewhat by not using a number of them. It should also be noted that some modelers mentioned that the track is wrong for a T-70M (or for that matter, the SU-76 and T-80), so MiniArt has come up with a track-link set to correct this. I am however satisfied with what came inside the box and am thinking of buying their Valentine tank and AEC armoured car kits. On a more sombre note, MiniArt is located at Simferopol, Crimea, smack in the conflict zone between Russia and Ukraine and there is a possibility that production might be interrupted by the crisis.

Friday, 2 May 2014

Matilda, Queen Of The Desert


Historical Background
In 1935, the British General Staff issued a requirement for an infantry tank. Designated A11 and built by Vickers-Armstrong, it was specified to be a low-cost tank, using commercially available parts such as Ford V8 engine, Fordson gearbox, a steering mechanism from the Vickers Light Tank and a suspension system adapted from the Mark IV Dragon artillery tractor. Armament was the Vickers machine gun. either in 0.303in or 0.5in caliber. While the turret and hull were well-protected against contemporary anti-tank weapons, the tracks and running gears were totally exposed. Furthermore the weapon was completely useless against tanks, severely limiting its utility. The commander also had to duck into the hull in order to use the radio, as it was located there. Designated Tank, Infantry, Mark I, it was allegedly nicknamed 'Matilda' by General Hugh Elles, the Master-General of Ordnance due to 'the vehicles diminutive size and duck-like shape and gait'. A total of 140 A11s were built.

In 1936, a decision was made to build a larger infantry tank and specification A12 was drawn up. Designated Tank, Infantry, Mark II, it was designed by the Royal Arsenal at Woolwich.The Infantry Tank Mark II weighed 27 tons and was armed with an Ordnance QF 2-pounder gun. The tank was heavily armoured, with 78mm for the hull front and 75mm for the turret. The contemporary Panzers III and IV had only 30 to 50mm of armour in its hull front. This made the tank impervious against the German 37mm and 50mm and the Italian 47mm anti-tank guns - only the 75mm Pak 40 and the 88mm gun can penetrate its armour. The heavy armour came at a price however. The Matilda II (as it was named following the withdrawal of the Matilda I) had an average off-road speed of just 9.7km/h. This was not thought as a major problem as the tank was designed to accompany infantry attacks with high priority over armour and trench-crossing ability. Another problem, not realised until the tanks went into combat, was the lack of HE rounds. This was a real handicap against anti-tank gun emplacements and the crew only had the co-axial machine-gun to use against unarmoured targets.

The Matilda II entered production in 1937, but only two were in service in September 1939. Both versions of the Matildas were used in combat by the 7th Royal Tank Regiment in France where the Germans were forced to use their 88mm Flak gun against the them. During the Allied counter-attack at Arras, the Matildas played a central role in briefly halting the German advance. All surviving tanks however were abandoned following the evacuation of the British Expeditionary Force from Dunkirk. In the North African theatre, the Matilda were highly effective against the Italian and German tanks. During Operation Compass, the Matildas wreaked havoc among the Italian L33 tankettes and M11/39 medium tanks while the anti-tank gunners found their shots bounced against the Matildas' armour. However the rapid maneuvering warfare practiced in the North African desert proved to be the Matilda's undoing. The 88 was also used in the theatre as an antitank gun, causing the loss of 64 Matildas, among others, during Operation Battleaxe. The Matildas were however instrumental in the Allied breakout from Tobruk and the capture of the Axis fortress of Bardia during Operation Crusader.

With the introduction of more powerful guns on German tanks such as the 50mm L/42 and L/60 and the towed 75mm Pak 40 anti-tank gun, the Matilda became less effective at normal combat ranges. The small turret ring meant that it cannot be equipped with a larger gun. The Matilda was finally replaced by the Infantry Tank Mk III Valentine in the autumn of 1941. The Matilda II was also used by the Soviets, who compared it with their own KV-1 tanks. The Matilda was roughly similar in speed and protection the KV-1 but were nowhere near in terms of firepower.The Matilda was also used by the Australians, where it reigned supreme as the Japanese lack heavy anti-tank weapons. The Australian Matildas were used in the Wewak, Bougainville and Borneo campaigns, remaining in action until the end of the hostilities, making it the only British tank to remain in service throughout the war.

The Kit
It was 2009 and Tamiya's Military Miniatures series was nearing kit #300. Speculations were quite rife then concerning the milestone kit. It eventually turned out to be the Matilda II, a kit Tamiya released back in the 1970s. Some wondered why did Tamiya basically released a kit that is already in their catalogue? For one, kit #024 is already a 30-something kit, moulded using 1970s technology. It also suffered from having many inaccuracies, chiefly being oversized (many of Tamiya's early kits suffer from this problem, which stemmed from the desire to include motorisation, powered by a C-sized battery). Secondly, while the Panzers and Shermans were done to the death by plastic manufacturers, Tamiya's was the only Matilda in 1/35 scale. So the new release with more accurate dimensions and better details is most welcome. As for the title of the kit, it denotes Matildas armed with 7.92mm Besa co-axial MG and the asterisk denotes Leyland, instead of AEC engine.

The kit was moulded in sand coloured plastic and the parts are spread among six sprues, a single piece upper hull, two flexible tracks, a length of string, some polycaps, a decal sheet and 16-page instruction sheet. A small photographic reference sheet was also included. As befits a modern kit, all the parts have very good detail (as far as the injection moulding technique allows) and generally correcting the omissions and mistakes of the earlier release. Apart from the flexible track, Tamiya also included link-and-length tracks. Both type of tracks however have solid guide horns (the ends were indented however) although the spare tracks have hollow guide horns! While kit #024 had two gun mantlets (one with shroud over the co-axial MG), this kit has only one. There are however three types of gun barrels - a smooth and a stepped 2-pounder barrels and a 3" howitzer for CS version while the co-axial Besa machine gun has hollowed barrel. There are also three crew figures (the driver figure is more of a bust). Decals are provided for three tanks:
 1. 'Phantom', 42nd RTR, 1st Army Tank Brigade, North Africa 1941 (Caunter scheme)
2. 'Defiance', 4th RTR, 32nd Army Tank Brigade, Libya 1941 (Caunter scheme)
3. 'Filibuster', 49th RTR, 35th Army Tank Brigade, UK 1942 (two-tone brown)   

Construction
As usual, construction started at the lower hull. Instead of the usual tub, Tamiya had the lower hull in four pieces - bottom (incorporating the rear), sides and the front. Some sub-assembly is required at the front before mating it to the rest of the hull. and then came the most tedious part of the built-assembling the road wheels, all 20 of them. Good thing they have no tyres, as it would mean painting 40 small strips of plastic to represent them! This was followed by assembling the suspension and some attention was needed to avoid mixing up the parts.The completed suspension was then cemented onto the hull and was followed by attaching the suspension cover cum mud chutes. At this point, I decided to paint the lower hull sides, before installing the tracks. As mentioned before, Tamiya provided both one-piece vinyl and link-and-length tracks. I originally wanted to use the latter option, due to better details. I however opted to use the vinyl track as it was an easier option and the the detail is pretty good plus most of it will be hidden. I sprayed the track TS-1 Red Brown, let it dry and joined it using regular Tamiya cement. Moving on to the next step, various holes for a number of fittings and  tools need to be drilled before work commences on the upper hull. I however added certain parts only at this stage, such as the headlights, light housings and engine deck parts; the rest would be added after painting. The upper hull was then mated to its lower half - the front part was cemented while the rear was secured using a polycap. Afterwards the exhaust pipings were added and Tamiya has nicely captured the surface detail of asbestos-wrapped exhaust pipes. Gluing the lower exhaust parts (D77 and D78) to the muffler were a bit awkward however because of the location. The work on the hull was finished (for the time being) by fitting the side skirts, which also incorporated the outer half of the return rollers. At this time I also decided not to fit the external fuel tank, so the recesses were puttied over.

Next, the turret. The cast pattern was nicely moulded, replacing the smooth moulding of the original release. As with the upper hull, there were a number holes that needed to be drilled plus three other holes if one is building the C option of the markings. The gun mantlet was then assembled and as mentioned before, Tamiya provided three types of barrels although the instructions only have you use part D13. A pair of polycaps secured the mantlet and allow movement of the gun. The main turret parts were then cemented together. As I intended to place the crew figures, the turret hatches were cemented in the open position. All the other turret parts which would not interfere with masking and painting were also cemented onto the turret at this time. Of a particular note is the turret smoke dischargers. On the real thing, it was made of cut-down Lee-Enfield No.1 Mk.III rifles mated to smoke grenade launchers. On the original Tamiya kit, the rifle part were just lumps but on this kit, there is good detail so that you may recognize the cut-down Lee-Enfields.

Painting and Decaling
I actually had the older Tamiya Matilda and still have the spare decals. I originally thought of building a plain desert yellow tank but I thought the better of it and decided to finish the model in the markings of 'Defiance'. Both it and 'Phantom' were finished in the Caunter (named after it's supposed inventor, a Colonel Caunter) scheme. Tamiya's instructions have you painted the scheme in XF-59 Desert Yellow, XF-23 Light Blue and a mix of XF-1 Flat Black and XF-26 Deep Green. Apparently Tamiya based their paint mixes on museum vehicles. However, modern research led by Mark Starmer showed different colour. The base colour is either Portland Stone or Middle Stone, The light blue is actually a colour called silver grey and the darker colour is Slate Grey. He also gave suggestions for the appropriate mix of Tamiya colours. I chose Portland Stone for the base colour and mixed XF-2 Flat White, XF-3 Flat Yellow and XF-57 Buff in a 6:1:1 ratio as per his instructions. The Silver Grey was a mix of XF-21 Sky, XF-19 Sky Grey and XF-4 Yellow Green in a 7:1:1 ratio while Slate Grey is XF-65 Field Grey. all were added with 20% flat white for scale effect. The decals were then applied with no problems. One note though, decals 9 and 10 (the number '4') were basically not interchangeable as the starboard 4 was in two pieces, to take into account the gun cleaning rod over its position. The figures are also painted at this time with the uniform painted XF-49 Khaki. The skin was painted XF-15 Flat Flesh with a bit more washes of red brown than usual to simulate tan (sort of). Afterwards, it was time to finish the model.

Finishing
All the remaining parts were cemented onto the model. As mentioned before, I did not intend to use the external fuel tank. Instead I crafted a stowage rack using Evergreen rods and strips as many Matildas did not carry the external tank up until the timeline of Operation Crusader. The rack was painted the same Portland Stone colour as the tank. To fill the rack, I put four 2-gallon 'flimsies' cans from the Academy Tank Supplies Set. The flimsies were painted silver, though I originally wanted to paint them white. Afterwards it was time for some weathering. First I applied a red brown/flat black wash all over the model. Next I applied some chipped paint on certain parts on the model using Tamiya XF-62 Olive Drab and also flicks from a 2B pencil. The mud chutes were weathered using Mig Productions' African Earth pigment while the whole of the lower hull were dabbed with Gulf War Sand pigments, applied 'wet' with enamel thinner. Once dry the excess was removed using a stiff brush. Diluted Tamiya X-19 Smoke was then applied at a few places on the lower hull to simulate leaked lubricants. Once they were dry, another slurry mix of Gulf War sand pigment and enamel thinner was applied and once again the excess was removed. Mig Productions' Pigment Fixer was then applied. I then reapplied X-19 to simulate newer leaks. The weathering was then touched up a bit with Tamiya's Weathering Master Sand. Finally, a length of brass wire was cut to represent the radio aerial and painted black. The crew figures were then cemented into their places, finishing the build.

Conclusion
When Tamiya came up with the Fieseler Fi 156 Storch for their 100th 1/48 aircraft series, the modeling community was quite abuzz with complaints that they have came up with a plane that nobody really wanted to be kitted (apparently, many modelers expected a British heavy bomber or something similar) and that the release was more of a tie-in with their 1/48 Military Miniature series. There were less complaints however with the 300th 1/35 Military Miniatures kit, perhaps because the original suffer from so many inaccuracies, especially being oversized. The newer kit offers all the modern mould-making can offer, coupled with Tamiya's unsurpassed kit engineering. Yes, there were a number of drawbacks, such as solid guide horns, detail-less turret interior and suspect painting instructions but it did not detract from the fact that it was a fine kit. A highly recommended kit to all.