Showing posts with label 1/72. Show all posts

Monday, 21 September 2020

TIE In The Sky


Fictional / Real-World Background

To replace Republic- and early Galactic Empire-era starfighters, the Imperial Navy ordered the new TIE starfighters from Sienar Fleet Systems. The mass-production TIE/Ln fighter took its designation from the Twin Ion Engine propulsion employed by the craft. The engine utilised microparticle accelerators to agitate ionised gases to relativistic velocities. The engine also featured ion stream deflector manifolds for pinpoint maneuvering accuracy. The stream of particles gave the engines a distinct 'howl' which became one of the hallmarks of the TIE series of starfighters. However in order to reduce the mass  and energy consumption, hyperdrive system, shielding and life-support systems were removed from the design, making the craft more vulnerable to even micrometeorite strikes. 


While a good space superiority fighter, the TIE/Ln's performance fell in planetary atmosphere. The Imperial Navy then decided to build a small number of experimental fighters derived from the basic TIE design. These were known as the TIE/sk x1 air superority fighter or TIE/sk atmospheric fighter or simply as TIE Striker. The craft is a more streamlined version of the TIE Fighter and was specialised for in-atmosphere missions. Due to it's speciality, it was one of the rarest version of the TIE. The Striker feature horizontal and pointed wings designed for atmospheric combat. The wing also helped improve the TIE/sk's VTOL performance. Additional speed can be gained by curling down the wing which is also the craft's attack mode. The TIE Striker is armed with two pairs of Sienar L-s9.3 laser cannons and a pair of H-s1 heavy laser cannons which can take out enemy starfighters or medium transports with just a few shots. An unknown number of VL61-79 proton bombs are dispensed through a  chute underneath the fuselage for ground support missions and is effective against vehicles while also dealing heavy damage over a fairly large area. 

Although intended to be an atmospheric fighter, the TIE Striker can still be used in space, accompanying the standard TIE Fighters. It is also useful to transfer personnel and supplies from orbit to planetary surface due to its larger pod/fuselage. By the time the Galactic Civil War erupted, the TIE/sk was used to defend important Imperial bases, most notably the Imperial security complex on Scarif. TIE Strikers remain in use throughout the conflict. The Imperial Admiralty however frowned upon the TIE/sk, seeing it as a result of indecision and wasteful expenditure such as atmospheric streamlining, pressurised life support and ground support weaponry. Its pilots however were anamoured by such novelty.
-----------------------------------------------------------------------------------------------------------------------------

The TIE Striker was a new design developed for 'Rogue One : A Star Wars Story', the first of 'anthology' series of Star Wars movies as the movie has scenes of in-atmosphere dogfighting at the planet Scarif.

The Kit
Following the release of Rogue One : A Star Wars Story, Bandai came up with the then-latest member of the TIE family in 2017. Size-wise, it was roughly a bit longer than the Rebel Y-Wing Fighter. The well-engraved parts are spread among five sprues including two in Bandai's distinctive multi-coloured sprue - one sprue in grey and black and the other in grey, black and green. Also included are the frames-only canopies and viewscreen. As with previous kits, the TIE Striker kit can be build-up without cement. The wing panel, like on the TIE Fighter kit, is trapped between the outer frames. A display stand is included by I'm not sure whether it's stable enough for this kit. A cut-out of an Imperial TIE Fighter pilot is also included  Markings are of the usual stickers and waterslide variety and there is also the usual 'laser bolts', 

Construction
As usual with flying things, even fictional ones, construction started at the cockpit. The interior was painted FS36375 Light Ghost Grey although I didn't bother with washes as the interior would be nearly invisible with the roof in place. Stickers were used for interior detailing. The hand-less pilot was also unpainted although decals were used for the Imperial insignia on the helmet. The cockpit interior halves were then mated together. This was followed by assembling the fuselage proper. The snap-tight construction means that there was actually no need to dab cement on the joints but a bit was needed on the forward portion to seal a slight gap. The TIE Striker is a two-seat craft although Bandai didn't bother with the rear cockpit as nothing could be seen anyway through the clear openings in the canopy. Some smaller parts were attached (and cemented, just in case) and the fuselage was set aside. The wing assembly is left off until after painting. I however forgot to paint the area under the rear canopy black. While not really visible from the outside, the empty interior is quite plain to see under a strong light source!

Painting and Decalling
Using my previous builds of Imperial TIE Fighters as a guide, the TIE Striker was Tamiya TS-32 Haze Gray. Unlike other Imperial TIE designs, the viewscreen frames and some small parts of the fuselage were painted Flat Black. The wing solar panels were painted Vallejo Anthracite Grey. The display stand was unpainted. Some small decals were then applied.

Finishing
The I started with the wing assembly. Nothing to shout here with the wings themselves as they fit very well. It was however quite a tight fit for the completed wing assembly to fit into its slot on the fuselage. The model was then given a wash. By this time, I am quite confident that the model can receive the enamel wash treatment and stuff from AK Interactive was used. The model then received a final coat of semi-gloss clear paint. It was then mounted on the display base. And talk about the latter, while it was basically the same as others in the series, it was just flat, plain plastic. Bandai however instructed the modeler to place the plinth in the opposite direction to ensure balance.

Conclusion
As with just about other Bandai's Star Wars model kits, the TIE Striker is a snap to build (pun, more or less, intended). There were not many parts and painting was straightforward (just two colours effectively) and not much weathering. Again, like building other TIE Fighters, you can even skip painting the interior as the cockpit is a virtual black hole and can hardly be seen from the outside especially if the clear plastic viewport and top hatch were used (the frame-only equivalent actually makes it easier to peer inside!).

Wednesday, 2 September 2020

"Kucing Laut"


Historical Background
In the 1960s, the British Army issued a requirement for improved helicopters. As the French Army also had the same requirements, Westland Helicopters and Aerospatiale signed an agreement in early 1967 to jointly develop the helicopter for their countries' armed forces. While Aerospatiale became the design leader for the large helicopter (eventually emerged as the Puma) and the 'small' helicopter (which became the Gazelle), Westland took up the development of the medium helicopter, initially known as WG.13 (and later as the Lynx). The first prototype of the Lynx flew on 21 March 1971. In 1972 a Lynx broke the world speed record over 15 km and 25 km by flying at 321.74 km/h and then set a new record for 100 km closed circuit by flying at 318.504 km/h. The British Army put an order for more than 100 Lynx AH.1 to perform various roles including transport, armed escort, anti-tank, reconnaissance and evacuation. Deliveries began in 1977

Meanwhile, the Royal Navy found that the Westland Wasp inadequate and had a strong interest in the Lynx. Therefore a navalised variant was developed as Lynx HAS.2. While the naval HAS.2 retained the twin Rolls-Royce Gem turboshaft engine of the Army Lynx, it differed by having fixed tricycle landing gear, foldable main rotor and tailboom, deck capture and and restraint system, emergency floating system and a bigger nose containng a Ferranti Seaspray radar. The colloquially-named Sea Lynx first flew on 10 February 1976 and officially entered service in 1981. The HAS.2 was then upgraded to HAS.3 with the addition of a towed magnetic anomaly detector, uprated transmission, Gem Mk 204 engines and Orange Crop ESM. In 1984, an enhanced version called Lynx-3 was proposed but was not pursued with due to insufficient orders. However in the early 1990s, Westland incorporated some of the Lynx-3 technology into a less radical design called the Super Lynx. This variant featured BERP rotor blades, new tail rotoer (derived from WG.30 design), a new under-nose 360-degree coverage radar, Gem 42 engines and optional EO turret in the nose. Royal Navy Lynx HAS.3s upgraded to Super Lynx standard were known as HMA.8. The Super Lynx was also offered to prospective clients as upgrades to their existing fleet or as new-build craft.

In order to fulfil maritime patrol, anti-submarine, anti-surface and SAR duties, the Royal Malaysian Navy placed an order for six Super Lynx Series 300 in September 1999. These would also complement the then newly-delivered Lekiu-class frigates. The RMN Mk.100 Super Lynx is powered by a pair of LHTEC CTS800-4N turboshaft engines rated at 1,563 shaft horsepower. It also incorporated an all-new glass cockpit with active LCD displays and new avionics. Half of the fleet is equipped with EO sensor on the nose. The pilots are also provided with NVGs for night-time operations. Anti-submarine weaponry consists of two A-244/S lightweight torpedo while anti shipping vessel weapons consists of up to four (but usually just one or two) BAe Sea Skua missiles. Pintle-mounted FN MAG 7.62 mm or FN M3M 12.7 mm machine gun may also be be fitted. The Lynxes are grouped into No.501 Squadron and was land-based at KD Rajawali.

The Kit
Hobby Boss came up with a bunch of Sea Lynxes in 2009. The HAS.2 version was the first release, followed by HAS.3, Super Lynx, Sea Lynx Mk.88 and Sea Lynx Mk.90. For this build, I chose kit No. 87239 (Lynx Mk 88). All the kits generally have nicely engraved and raised details although most details for the cabin interior is missing save for some equipment boxes and jump seats (which I think were usually not installed in the naval Lynx). The model is also missing the pedestal-mounted winch for SAR work. The nose is separate so that modelers can chose either to have the radar nose of the one with the EO sensor dome. There are also two styles of main gear fairing so chose according to your reference. For external ordnance, two styles of torpedoes (a pair each) and a pair of Sea Skua missiles are included. Decals provide markings for two Bundesmarine birds.

I however intended to build a RMN bird and so have purchased a conversion set from Naza Model Works. This set includes a new engine fairing, exhausts, the aforementioned winch, a new instrument panel, central console and also a small decal sheet.

Construction
As usual, the construction steps started with the interior of the aircraft. However, this time I started by sawing off all the resin replacement parts off their pour stubs and hacking away portions off the main fuselage halves. The NMA conversion kit did not actually show the areas to be removed but their FB page shows a post of the conversion part being dry-fitted to the basic kit and that indirectly shows which area of the original kit to be removed. Only then did I continue with the interior. There wasn't much to do here as the kit's interior is quite sparse (there wasn't even the collective stick!). The troop seats can be left off as the Super Lynx (at least in those in Malaysian service) were rarely used as troop transports. I just add the seat behind the pilot for the cabin interior. The holes on the cockpit floor were then puttied in. However, the base for the rotor shaft cannot be used as the replacement engine housing is too thick at the opening for the rotor shaft and cannot be drilled through easily. 

Next, the replacement engine fairing is put in place. But before that, holes for the exhaust were cut out (the resin is thin over the openings). The resin wafer covering the air intakes can be left on (and painted black later on) or removed although the latter option means they open into nothingness (not really a problem actually). Since I cut badly, extra putty were needed to cover the gaps between the fuselage and the engine housing. There are two types of sponsons provided and the one similar to RMN Lynxes' were used. However the chosen sponsons lacked some detail such as tie down eyelets. As RMN Lynxes have both radar and EO noses, decision has to be made here and it was, more or less, dictated by the provided decal sheet. The latter only provide markings for M501-1, -3 and -5 which have EO sensor on the nose

Although the conversion kit includes the winch assembly, I didn't use it as I have the cabin doors closed. The ESM antennas on the rear of the fuselage was not fitted on RMN Lynxes and the holes were puttied in. The blobs on the mount were removed and transplanted to rear of the sponsons. Obliterated cabin door railings were restored using styrene strips (one looks rather OK, the other, quite bad!). To ease handling while painting and decalling, the landing gears, weapons pylon and the rotors were left off at this time. Oh yeah, one more thing, part of the landing gear sponson is actually covered in canvas, so I have to mask, apply putty and sand before painting.

Painting and Decalling
I have to confess: despite my year of dabbling in scale modelling, I still can't correctly identify which colour to be used without being told which is which. In this case, I'm not sure whether the helicopter is painted in medium Sea Grey or Dark Sea Grey (despite being in front of it). Fortunately, there is a photo of the pre-delivery M501-1 in front of a Royal Navy Merlin. I know for sure that RN's Merlins were painted MSG (the instructions for an aftermarket decal sheet said so(!)) and as the Lynx looks darker than the Merlin....then it must be painted in DSG then. The area around the engine intakes, the anti-glare panel and the ESM antennas were painted Flat Black. For markings, both inbox and the conversion kit were used with the inbox decals providing most of the stencils. However, there are some 'misses' with the in-box decals. First, the port 'rescue' arrow has a different orientation than the one on the real aircraft. Secondly, a number of decals are missing from the decal sheet - there are only two decals for the kick-in steps and there is only one stripe decal for the Sea Skua missile.

Decal application went without a hitch, except for a warning sign on the starboard engine casing; the carrier film was quite stiff and somehow unable to stick to the surface. I replaced it with paint but being unable to replicate the stencil, I just painted dots to replace the alphabets...haha. Having looked into my spares box for suitable replacements, the port 'rescue' arrow had to be placed into wrong position. Another inaccurate decals are the 'Step' markers on the main wheel sponsons. And finally I decided to paint the warning stripes on the tail rotor rather than using the decals. 

Finishing
I started by adding the EO dome and the missile rack. Speaking of the latter, Hobby Boss instructed you to use Parts D5 and D6 which somehow look dubious and not used on RMN Lynxes and I believe is for the carriage of two missiles each. I decided to replace it with Parts F3 and F4 as the missile pylon can fit onto it. Test fitting however showed that the missile would be lower than the landing gear. This required further modification by removing the upper part of the pylon. On the real aircraft, there is a cable running through the antenna blades at the bottom of the tail but I decided not to add them. The main landing gears were canted outboard a bit as the real aircraft is usually seen as such (unless the wheels are chocked). The panel lines were then applied with AK Interactive Paneliner. The missiles were cemented to the pylons and the rotors were put in place.  After that the whole model was sprayed with Mr Color Semi-Gloss Top Coat, the masks removed, finishing the build.

Conclusion
Hobby Boss's Lynx is a fairly nice representation of the real thing in 1/72 scale. The outside surfaces are fairly detailed although the interior, especially the main cabin is very sparse although with all doors closed, it wasn't a problem. The decal is also quite disappointing as Hobby Boss missed quite a number of the more prominent ones especially for the kick-in steps. As for the conversion set, NMA has come up with another excellent conversion set for Malaysian armed forces'birds. My complaint against the set was just the lack of cabin machine gun mount. Although the Lynx kits from Hobby Boss are modular, and basically the same among the HMA.8, Super Lynx and Lynx Marks 88 and 90, I finally realise why NMA recommended the Mk 90 as the basic kit for the conversion - the Mk 90 kit 'essential information' decals are more appropriate for a RMN Super Lynx!  


Wednesday, 6 May 2020

The Mudhen Returns To Mideast


Historical Background
The F-X fighter programme which resulted in the McDonnell Douglas F-15 Eagle was specifically tailored for air superiority mission with little consideration for air to ground missions (hence the phrase 'not a pound for air to ground'). The opposition by the F-15 Special Project Office in The Pentagon caused McDonnell Douglas to quietly work on the interdiction version of the Eagle envisioning it as a replacement for the F-111, the (then) remaining Phantoms and to augment existing Eagles. In 1978, the USAF initiated the Tactical All-Weather Requirement Study (TAWRS) which, amomng others, looked at McDonnell Douglas's proposal. The study recommended that the Eagle as the USAF's future strike platform and in 1979, McDonnell Douglas and Hughes teamed up to develop the F-15's air-to-ground capabilities. An F-15B, serial number 71-0291 was modified to act as a demonstrator and was first displayed at the Farnborough Air Show in 1980.

In March 1981, the USAF announced the Enhanced Tactical Fighter (later renamed Dual-Role Fighter) programme to procure a replacement for the F-111. The programme envisioned an aircraft capable of flying deep air interdiction missions without additional electronic support and fighter escort. McDonnell Douglas submitted its now-named F-15E while General Dynamics submitted the F-16XL. After a lengthy evaluation programme, the F-15E was chosen as the winner on 24 February 1984. Key factors in the selection of the F-15E over the F-16XL include lower development costs, belief that the F-15E had future growth potential and twin-engine redundancy. The first officially-completed F-15E was first flown on 31 March 1987 and the first production aircraft was delivered to the 405th Tactical Training Wing at Luke AFB, Arizona in April 1988. The USAF contracted for a total of 400 F-15Es (later revised to 392).

The F-15E Strike Eagle, although optimized for air-to-ground missions, retains the full air-to-air combat capabilities of the original Eagle. Although the prototype was basically a modified F-15B, production F-15Es have significant structural changes and using much more powerful engines (originally Pratt & Whitney F100-PW-220 rated at 105.7 kN with afterburner, later the Dash 229 version rated at129.7 kN with afterburner). The rear cockpit position is 'missionised' to allow the WSO to work the air-to-ground avionics (while still having flight controls, allowing the WSO to pilot the aircraft should it become necessary). Conformal Fuel Tanks (CFTs), containing 2,800 liters of fuel (in addition to the original  internal tankage) on either sides of the fuselage gave the Strike Eagle its long legs at a slight cost in drag and performance. The APG-70 radar system incorporates Doppler Beam Sharpening, Mapping and Synthetic Aperture Radar modes to enhance operational capabilities. One feature of the system is that it can 'freeze' the air-to-ground radar map and then goes back to air-to-air mode to check for aerial threats. In addition, the WSO is able to designate ground targets while the pilot engages aerial targets. The APG-70 was replaced by the APG-82 AESA radar beginning in 2014.

The F-15E carries most air-to-ground weaponry in the USAF inventory, from 'dumb' Mk 80 series bombs to precision strike JDAMs. Since it inherits the original Eagle's counter-air capabilities, they regularly carry air-to-air missiles and trained for counter-air missions. Precision delivery of weapons by day or at night and in poor weather was made possible by the use of LANTIRN pods mounted externally. The targeting pod (AN/AAQ-14, AN/AAQ-28 LITENING or AN/AAQ-33 Sniper Advanced Targeting Pod) contains a laser designator that can mark an enemy's position from as far away as 16 kilometers. The AN/AAQ-13 navigation pod  contains a terrain-following radar to allow the aircraft to fly safely at very low altitude and it even allows a hands-off terrain-following capability. The pod also contains a FLIR for night or low-visibility flight conditions. Tactical Electronic Warfare System (TEWS) integrates all the countermeasures available (RWR, chaff, flare, radar jammer). An AN/ALQ-131 ECM pod can be carried if required.

The F-15E, dubbed Strike Eagle (or more popularly, the Beagle ('bomb eagle') or Mud Hen) achieved initial operational capability on 30 September 1989 with the 336th Tactical Fighter Squadron of the 4th Tactical Fighter Wing at Seymour-Johnson AFB, North Carolina. The Strike Eagles were first deployed for combat during Operation Desert Storm conducting diverse targets, from mobile Scud missile launchers to fortified bunkers. They were also involved in 'tank plinking' attack missions prior to the start of the Coalition's ground offensive. An air-to-air 'kill' was scored on 14 February 1991, when an F-15E hit a flying/hovering Mil Mi-24 with a GBU-10 laser-guided bomb. USAF F-15Es continue to be deployed in various operations such as during Operations Northern & Southern Watch, Operation Deny Flight, Operation Enduring Freedom, Operation Iraqi Freedom, Operation Odyssey Dawn and Operation Inherent Resolve.

The Strike Eagle also enjoyed export success with variants being sold to Israel (F-15I Ra'am), South Korea (F-15K Slam Eagle), Saudi Arabia (F-15S/SA) , Singapore (F-15SG) and Qatar (F-15QA). Proposed variants include F-15SE Silent Eagle incorporating internal weapons carriage and use of radar-absorbent materials. Israel and Saudi Arabia have also used their Beagles in combat.

The Kit
Despite being in service since 1989, the F-15E received a rather cool attention from model kit companies. The 1/48 fraternity is quite well served with a number of kits depicting the E version but the 1/72 community was less so with the prototype-feature kit from Hasegawa (who then, true their policy, re-released it a number of times). The same goes with Airfix, Academy and Italeri. In 2011, Fujimi came up with a new-tool Beagle. While having all the 'E' features, it unfortunately suffered by being overscale, something around 1/66 rather than 1/72. In 2012, Hasegawa finally decided to do a new-tool F-15E in 1/72 scale. And now we have a relative newcomer, Great Wall Hobbies with their rendition and I think this kit is a worthy rival to the Hasegawa kit. First impression is good with parts displaying crisp recessed lines and nice (for 1/72 and in plastic) raised details. Unlike Hasegawa the GWH offering has a more contemporary ordnance to be hung beneath the model. Decals provide markings for three aircraft:
1. 87-0173 'Shark Mouth', 391st Fighter Squadron 'Bold Tigers', 366th Fighter Wing, Mountain Home AFB, 2002
2. 87-0169 'Tiger Lead', 391st Fighter Squadron 'Bold Tigers', 366th Fighter Wing, Mountain Home AFB, 2002
3. 89-0488 ' 336th Fighter Squadron 'Rocketeers', 4th Fighter Wing, Al-Udeid AB, Qatar 2003.

Construction
As usual with aircraft kits, construction started at the cockpit. The seats while having better details than kit-supplied parts of yore, still cannot compete against resin aftermarket ones. nevertheless I still used them for this build.  The cockpit features nice raised details, which although not mentioned, must be sanded off if one wants to use the decals for the instrument panels. I just applied them over the riased details. Also, GWH forgot to mention in their instructions about two further decals that needed to be placed for the WSO's office  And, as per my usual style, the parts for the cockpit were painted while still on their sprues. After the cockpit has been compeleted, the forward fuselage halves were closed together. While the forward bulkhead was used, I left off the radar parts as they won't be visible anyway. Modelling clay was then filled into the nose cavity to act as ballast, just in case. The intake tunnels have the vanes inside it but there are no actual locating holes and I opted not to add them.

GWH thoughtfully include the steps to build the model in flying pose so take note of the relevant parts to build the model with its wheels down. The main upper fuselage was assembled and was the attached to the lower fuselage/FAST pack. However GWH did not indicate holes to be drilled for the pylons (although I should have known better). I managed to pry back the wings and drilled the holes underneath the wings but it was too late for the fuselage bottom. The forward fuselage was the jointed to the main fuselage. The fairing behind the cockpit was then added. and, almost predictably, resulted in a number of seams. The exhausts were left off at this time. The fin tips are needlessly separate. The tangential pylons are butt-jointed to the sides - there are engraved marks to help you. Funnily enough, the instructions ask you to drill holes for them. Thankfully, holes have already been pre-drilled for the long pylons. The tabs to mount ordnance were however removed from most of the  pylons.

Painting and Decalling
While fighter Eagles were painted two-tone greys, the 'Bomb Eagle' was painted a uniform dark grey, specifically, FS 36118 Gunship Grey. The paint used was Vallejo AIr 71.097. The metallic end of the fuselage was painted Tamiya TS-30 Silver Leaf with certain parts were painted Mr. Color Super Titanium or Super Iron 2. The exhaust petals were painted Gunze Burnt Iron while the insides were painted Flat White. The ordnance were painted Olive Drab although somewhat bafflingly GWH suggested Gunship grey for the GBU-15. After the paint has dried, it was time for the decals. My selection is somewhat affected by the rather arbitrary weapons load selection suggested by GWH, which I think was influenced by the now-defunct F15e.info website. As I wanted to have a rather 'heavy' load, the third option was taken. The decals looked rather thick and several stencil decals shared the same carrying film. While somewhat shortening the decalling proces in theory, one might end up with large patches of silvering. I end up cutting up most of them into separate pieces, leaving just the decals for some 'No Step' stencils and the group on both sides of the cockpit.

Another issue with decals is concerned with the coloured strip at the top of the fins. GWH printed them in a way that they are all of the same orientation. Two of the four need to be printed facing the same side with the other two on the decal sheet. The way they are actually printed, the decals for the port fin inner right fin outer could not be used and I had to paint the relevant strips.  The decals were then bedded down with an application of Mr. Mark Softer. The panel lines between the control surfaces and the body were enhanced using AK Interactive Paneliner while the rst of the panel lines were slightly enhanced using a pencil. The inside of the exhausts were then weathered using Tamiya Modeling Master Soot.

Finishing
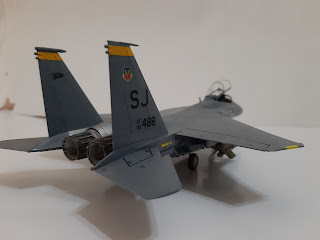
I started by assembling the landing gears. As usual in 1/72 and with models of modern planes, they are quite fiddly during assembly. After  being painted and weathered, they were attached to the model. Fit is quite tight and I ended up having a splayed main landing gears. After some trimming, they are now straight, perpendicular to the fuselage. Also, GWH moulded the main wheel tyres 'weighted'. However the instructions mis-pair the wheel halves and you might end up having a flat spot at the top of on one half of the wheel. Once the model stands on its legs, I added the weapons, pods and external tanks. I however use the Sidewinders and an AMRAAM from Hasegawa's US Aircraft Weapon Set V. The GBU-15 can easily be converted into AGM-130 simply by using adding part (which was marked as 'not used' in the instructions. If you still want have the weapon as a GBU-15, fill the holes at the bottom of the bomb. Next up is the canopy. I forgot to mention that there is a gap between the windscreen and the fuselage which needed filling. There was no problem encountered when fitting the canopy to the fuselage but by this time you realise that the tranparencies are pretty thick, especially when the canopy is in the open position. Finally the blade aerials were fitted and the build is finished.

Conclusion
The kit itself does not have any deal-breaker or any noticeable shortcomings and is a good alternative to the Hasegawa kit. The instructions however is a different matter and suffer from a number of mistakes. It probably wouldn't faze seasoned modellers but would probably cause some problems to newcomers to the hobby. Also the GWH kit, like the Hasegawa kit, only provide markings and ordnance and sensor options appropriate to the Operation Enduring Freedom / Operation Iraqi Freedom era (like clearly stated in the kit's sub-title). Aftermarket stuff were needed to to display the model in a more contemporary setting.

Monday, 6 April 2020

Blade Runner


Fictional / Behind-The-Scenes Background
The B-Wing, or to give its full designation, the Slayn & Korpil A/SF-01 B-Wing assault starfighter began as as a development of Prototype B6 or 'Blade Wing', a craft designed by Quarrie, a Mon Calamari engineer at planet Shantipole as a part of Project Shantipole. It was centred around delivering large amounts of firepower within a thin, narrow and agile profile. Several of its features such as S-foils and gyro-stabilised cockpit originated from Clone War-era starships such as the V-19 Torrent starfighter and the T-6 shuttle. The prototype was used by a Rebel crew of Hera Syndulla and Sabine Wren to break the blockade of planet Ibaar, destroying one of the blockading Arquitens-class command cruiser, Quarrie awarded the B6 and his expertise to the Rebel Alliance to improve the craft while Wren volunteered to redesign the Blade Wing's weapons and targeting systems.

As an assault starfighter, the B-Wing was relatively poor space close-combat fighter as it was primarily designed as a blockade buster to destroy or disable capital ships. The craft is basically a flying wing with a cylindrical cockpit at one end, a weapons pod on the opposite end and an engine cluster in between. Two S-foils mounted on the engine cluster can be extended in attack configuration. The heavy armaments package comprised of two Gyrhil 72 twin blasters at the cockpit module, a cluster of an Armek SW-7a ion cannon, a Gyrhil R-9X laser cannon and a Krupx MG9 proton torpedo launcher at the weapons pod plus another proton torpedo launcher at the engine cluster and an ion cannon at each end of the S-foils. The unique gyroscopic cockpit control system keep the cockpit module horizontal no matter how the rest of the craft was positioned. Avionics package was on par with small capital ships and advanced targeting systems allow the crew of B-Wings to co-ordinate their attacks together.

Impressed with the debut performance of the Blade Wing, Senator Bail Organa arranged to have a starship manufacturer to further develop the craft. Slayn & Korpil, based at the Roche Asteroid Field and owned and operated by renowned Verpine shipwrights agreed to build them for the Rebellion. However despite the prototype being described by it's creator as 'agile' and 'fast', the production B-Wings were the complete opposite, despite eliminating the defensive gunner's position and its associated system and the composite-beam laser. It was slower and more ponderous than other starfighters of the Alliance and the Imperial Navy. It was also tricky to control and the advanced gyro-stabilised cockpit can only be mastered by the most skilled pilots. Intended to replace the venerable Y-Wings, its weaknesses meant that the Y-Wings soldiered on until the Battle of Jakku. Nevertheless, with good space superiority fighter escort, the B-Wing proved to be an excellent assault starfighter and bomber and can even be quite a handful in ship-to-ship combat.

-------------------------------------------------------------------------------------------------------------------------

The B-Wing was designed by Joe Johnston and Bill George for Return Of The Jedi. The B-Wing got its name after the production crew labelled two new Rebel starfighter designs as 'A fighter' and 'B fighter'.  The name 'Blade Wing' was introduced in the Expanded Universe (now known as 'Legends') and was canonized in the Star Wars Rebels animated series. The Legends continuity have the B-Wing designed by the Rebel Alliance (led by Admiral Gail Ackbar) following the Battle of Yavin and therefore was only 'available' during the Battle of Endor and therefore did not take part in the Battle of Yavin. However, the new Star Wars canon have the B-Wing designed and operated before Yavin and therefore leaving plot holes in the continuity. The Star Wars Rebels series explained this apparent discrepancy by having that the B-Wings (and A-Wings) were the main fighters used by the Phoenix Squadron in Rebels while General Jan Dodonna's cell, based at Yavin were primarily equipped with X- and Y-Wings and only during the Battle Of Endor that the entire Rebel Alliance comes together and therefore the presence of all the fighters in ROTJ.

The B-Wing model, with its unusually thin shape was hard to film for blue-screen photography as it tended to blend with the star field and as a consequence some planned sequences featuring the B-Wing were cut from the original release of Return Of The Jedi.

The Kit
The Star Wars geek in me had a 'whoopee' moment when I read that Bandai have released a 1/72 kit of the B-Wing. The craft occupies a soft spot in my brain, having piloted it my youth playing LucasArts' X-Wing simulation game (and also fighting against it in 'TIE Fighter' where that gyrostabilised cockpit played a bit of mind trick while chasing it). I wasted no time in heading towards the local hobby shop and there it was, on the shelf. I did not hesitate to part with RM! The parts are spread among eight sprues with Sprue A moulded in Bandai's signature multi-colour parts, this time including clear parts for the canopy. The display stand is clear plastic plus the tinted clear plastic for the laser bolts (I strongly believe that Bandai should have included electric blue-tinted plastic to simulate ion blasts). Initial browsing of the instruction sheet shows that the model is poseable either in a 'vertical' or horizontal' mode and the smaller wings can be posed open or closed. Markings as usual came either as stickers or waterslide decals. As with their other Star Wars kits, the B-Wing feature finely engraved and well-executed raised details.

Construction
Basically, construction can be divided into four sub-units : cockpit module, engine, main wing and secondary wing. And, as usual, construction started at the cockpit module. Also, as usual, the pilot's office was painted first. There are decals for some of the cockpit instruments but I prefer to paint them this time. The blaster cluster at the nose were also pre-painted at this time. Some dry brushing was done on the raised details inside the cockpit. The pilot figure and the canopy were however left off at this time. There was some gap at the rear of the module (perhaps due to the multi-part nature?) but it was nothing serious and can be easily overcome with a small amount of putty. The completed cockpit module was then placed in between Parts C2 and C5 which form the main component of the engine module. The cockpit remain moveable although quite tight due to friction between the module and the adjacent areas in front and the rear of the erm, 'throat'. Maybe I should've sanded it down.

The engine module include a clear part to be inserted inside the main 'bay'. Apart from adding strength and allowing the fitment points for the exhaust cones, it also functions as light conduit should you decide to add LED lighting for the engines. The secondary wings (which look like reversed and enhanced F-16, F-18 or F-5 wings) were next. No problems were encountered while joining the wing parts together but I do ran into a bit of a problem when trying to join the wings to the main body. Clear parts FB1-10 and -11 were used to join the wings and allow movement. This meant that the wings need to be aligned correctly when inserting the clear parts into the slots. This was to be quite difficult because of the very tight fit. I pulled the clear parts out and using a new blade, scraped lightly the grooves inside them. Afterwards, it was a bit more easier to push them into the slots. Oh, take note that the notched tab on Part FB1-10 and -11 is meant to be outward so that Part C4 can fit over them.

Finally the main wing (which looks like a wing from an F-14 or an F-111 kit). A word of advice first - if you want it easier to paint the junctions of the secondary wing, cut off the bottom of the large tab, leaving the semi-circles at the top so that the main wing can be assembled separately and inserted later. Anyway, I kept following the instructions to the letter and the main wing was completed and fixed to the main body. The main gun cluster was painted and assembled but it, along with the fairing and the light blue-moulded end of the main wing were left off at this time. The guns at the tip of the secondary wings were also left off to ease painting. Oh by the way, the fairing had a very tight fit and resulted in gaps towards the front of it. Again, putty was needed here.

Painting and Decalling
For painting, I resorted to the same colour used in my Y-Wing that is white with a bit of light grey (FS 36495) added although the ratio of the light grey is a bit less than the one used for the Y-Wing. The grey parts were painted a 70/30 mix of Tamiya XF63 German Grey and XF18 Medium Blue (effectively making it Panzer Grey). The blue parts were painted XF23 Light Blue. Unlike the previous starfighter builds, the B-Wing has quite a number of decals to be applied. This, intriguingly include a USAF-style shield-type unit badge and a number of stencils. While most of the latter are illegible, a few are quite big enough to read. I didn't due to failing eyesight and not having a magnifier at hand. They do look like Roman alphabet though. Anyway, all went in without any trouble except for a three-part roundel. You need to cut off the carrier film for that particular decals as much as possible to ensure a better fit over the raised details. I also elected to paint the decals near the wingtips of the secondary wings. 

Finishing
The pilot figure, which was done during the kit painting process, was placed inside the cockpit. His flight suit was painted German Red Brown as I think it closely matched the suggested paint mix. The skin tone is XF-57 Buff (as he is a Sullustan, not a Human, mind). Although I managed it during the Y-Wing build, I chose not to use enamel-based wash for this kit. Instead, I use water-color based sludge wash technique on all engraved panels and some of the raised details. Enamel-based AK Interactive stuff was however applied on areas not adjacent to connecting panels to avoid it leaking into bare plastic. And just to test my AK Weathering Pencil, I applied the Gun Metal pencil on the muzzles of the laser and ion cannons. The main cannon cluster was then attached to the main wing (again without the need for cement) and followed by the ion cannons at the end of the secondary wing. Bandai provided a different style of display stand for the B-Wing although the 'regular'-style stand is available separately. The clear sprue for the stand however include a number of items but there are no indications on how to use them and I just use the recommended stand. To conserve space in my display cabinet, the B-Wing was put in a vertical position.

Conclusion
Another fine kit from Bandai and I was not disappointed. The kit feature fine detail and a hassle-free construction. I think the area which need a little bit of effort is concerned with the connection of the secondary wings with the fuselage and the fairing of the main gun cluster. And by the way, you can customize and/or weather it the way you like it as (1) it was a sci-fi model and (2) it did not enjoy much screen time so NOBODY can say that your model is 'wrong'!   


Tuesday, 17 March 2020

"Watch Out For Those Towers!"


Fictional / Real-World Background
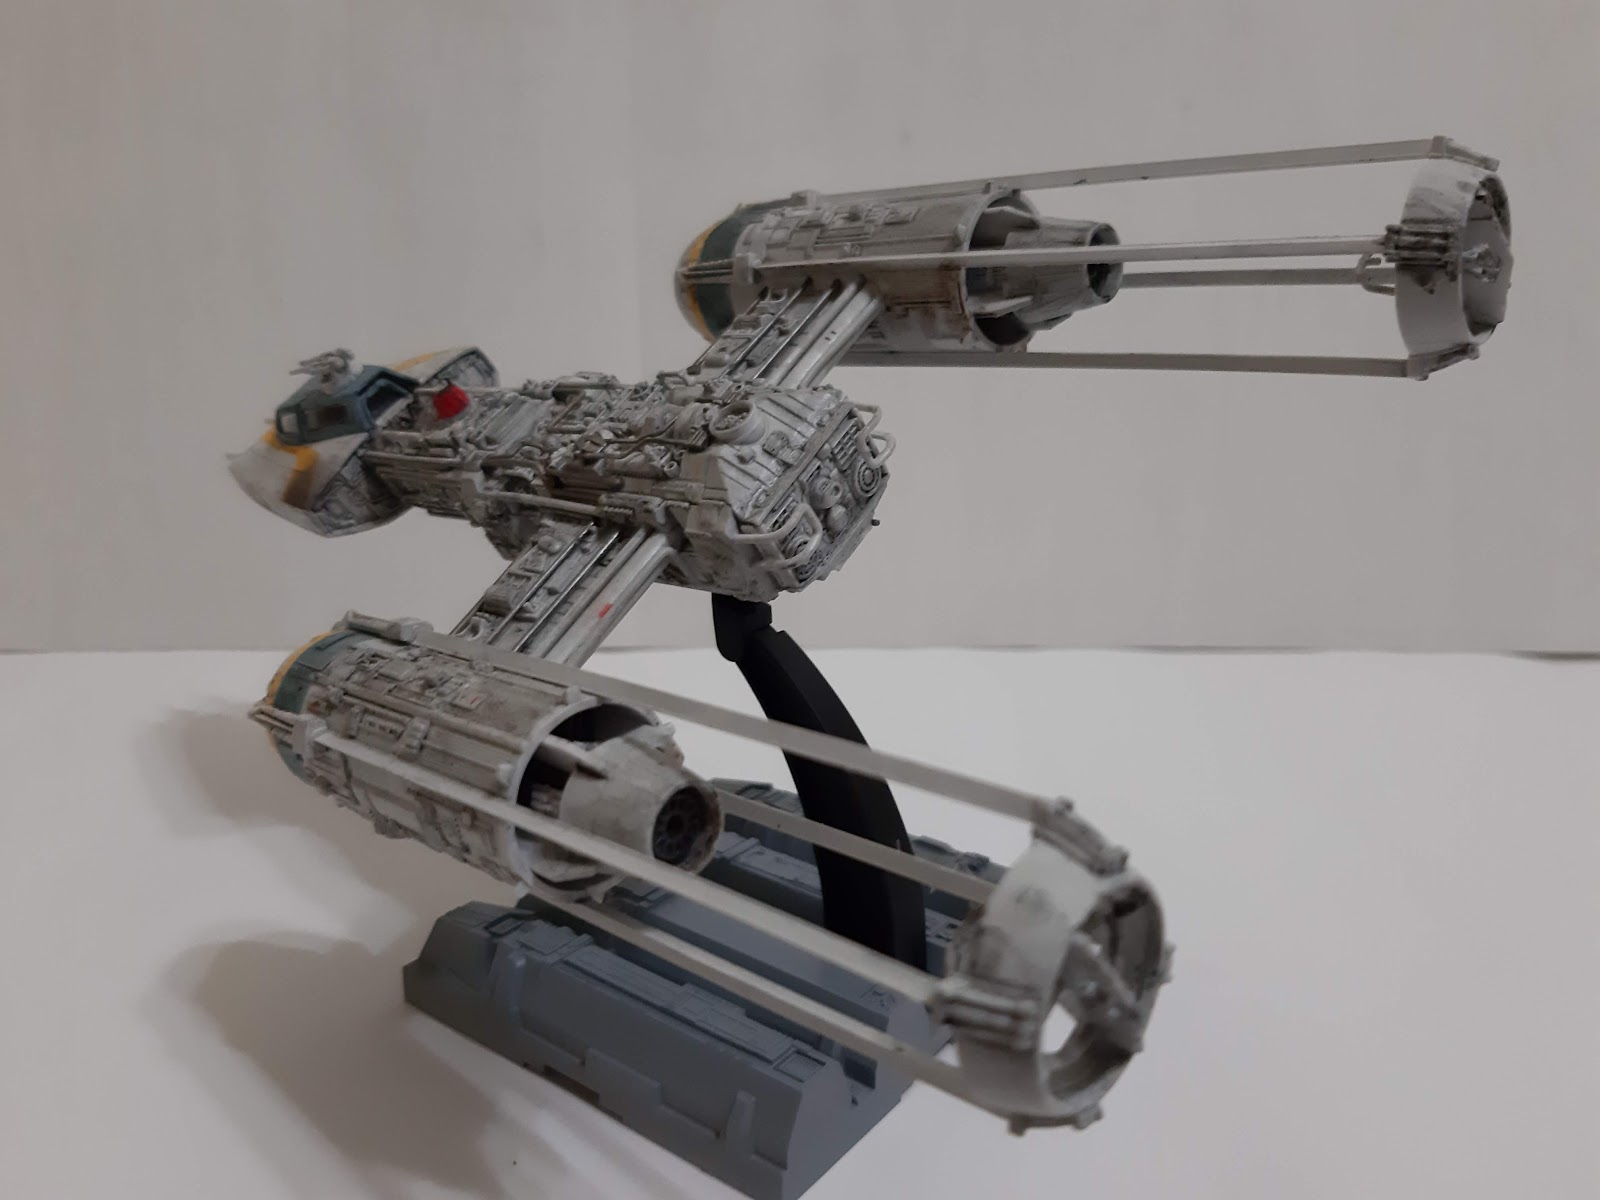
Koensayr Manufacturing BTL series of starfighters, better known as the 'Y-Wing' can trace its origins to the early Clone Wars era. The Galactic Republic commissioned the type as a combination of fighter and long-range bomber to supplement the V-19 Torrent and Delta-7 starfighters. Acquired by Jedi Knight Anakin Skywalker in an unsanctioned mission to retrieve the still-prototype craft, the BTL-B was used in an attack on General Grievous' flagship, the Malevolence. The success of the attack by the Shadow Squadron prompted Koensayr to develop other variants of the craft, including BTL-S3 and BTL-A4. The original BTL-B established the shape of the series with two large ion jet engines with their characteristic nacelles. The engines were carried by a cross wing which connected to the cockpit module on a central spar. The BTLs have a tendency to run hot which necessitated a complex cooling system throughout the craft.

Although production has started, the end of the Clone Wars and the rise of the Galactic Empire stopped any further production as the new Imperial Navy shifted towards capital ship-based  space superiority doctrine. As Koensayr lost their government contracts, the surplus stock of BTLs were sold to local planetary defence units although Imperial intervention caused many units remain unsold, being repossessed or sent to the salvage yard. As the BTL-B models were scrapped first, this made the -A4 version being the most numerous of the fighter. These idle craft became the focus of the nascent Rebellion in order to arm themselves. BTL-A4s were either purchased, or most of the time, stolen from military surplus dealers and scrapyards. Soon, the so-called Y-Wing fighter became the most common craft in the Rebel arsenal.

As mentioned before, the BTL-A4 is the single-seat version of the BTL-B with the second crewmember replaced with an astromech droid. For power, the craft had a Novaldex power generator and Thiodyne 03-R cryogenic power cells. Two Koensayr R200 ion jet engines were attached to either side of a central spar. At the front end of each engine nacelles were domes which contain  Fabritech  ANx-y long-range sensor arrays, PA-9r long-range phased tachyon detection array and PG-7u short-range primary threat analysis grid. Hyperspace capacity was provided by a R300-H hyperdrive mounted at the rear of the spar.  Armament comprised of a pair of forward-mounted Taim & Bak IX4 laser cannons, a pair of Arakyd Flex Tube proton torpedo launchers (with a payload of 8 Krupx GR7 proton torpedoes, or concussion missiles, ion torpedoes or proton bombs) and a pair of  turret-mounted ArMek SW-4 or SW-5 ion cannons (as the BTL-A4 is a single seat craft, the cannon was usually fixed to fire forward or towards the rear). While factory-fresh Y-Wings featured armour plating around the engines the central spar, Rebel technicians stripped them off to ease maintenance.

As the Alliance's workhorse starfighter, the Y-Wing was involved in numerous minor and major engagements during the Galactic Civil War including the Battle of Scarif, Battle of Yavin, Battle of Endor and Battle of Jakku.
-----------------------------------------------------------

The Y-Wing design is based on a concept art by Ralph MacQuarrie. As with the X-Wing design, the attack fighter was given the name 'Y-Wing' due to its resemblance to the capital letter Y when viewed from above. The fighter's rough appearance was the vision of Joe Johnston who envisioned that the factory-spec fighters were chopped and stripped like a hot rod by Rebel technicians.

The Kit
Bandai has been busy releasing kits of the Star Wars franchise vehicles and characters since acquiring the Star Wars licence from Disney.While I was quite skeptical before, all of the feelings were unfounded after building a number of their kits. The Y-Wing was released in 2015 and it featured all the hallmark of Bandai, including the multi-coloured sprue. The kit, as with most other Bandai Star Wars (or any other kit produced by them) is snap-fit but without the problems of old-style models of the same style of assembly. The raised details look very good and would benefit from washing process. As before, there are two types of canopies - one frames only without the glazing while the other is moulded in clear plastic. The latter can also be posed open. There were three pilot figures - one standing, the other two seated (one in the flight suit featured in Episode IV, the other in a suit featured in Episode VI). Two droids, an R2 and an R4 unit were also included. Markings were provided in decal and sticker form.

Construction
As usual with things that fly models, be it real or fictional, construction started at the pilot's 'office'. Although already moulded in black plastic, I painted it Vallejo Anthracite Gray as it looks more in-scale. The instrument and side panels can be painted as there are raised details. Alternatively, stickers or waterslide decals can be used after removing the said details. Too lazy to either paint or sand, I just apply the decals on the raised details. They however respond quite well to decal softening solution and that about covers it. The cannon barrels and the inside face of the coaming covering the barrel root were also painted before assembly. It should also be noted that the yellow trim seen on these ships in the movie was painted-on markings. Bandai however supplied them as a separate plastic piece, resulting in unnecessary panel line around it. The rear panel of the cockpit module include the rear cockpit transparency. This however is of the glazing-less type - fine if you want to use the frames-only canopy.

Construction then moved to the main fuselage. The moulding for this area is very nice and captures that rough, expeditionary feel of the original studio models. Also as a note of interest, the rear panel of the rear fuselage is a miniature of a Panther engine deck as used on the original studio model.The parts fit nicely with certain smaller parts need to be fitted to a larger part before being attached to the main body. Some parts didn't have positive 'snap-fitness' so I cemented them. The body of the astromech droid was painted but I didn't add any detail painting on it as it would be invisible inside the droid socket. I also didn't add most of the pipings seen on the surface of the rear fuselage as I think it would be better for me to add them after the fuselage has been painted.Also, due to some mis-handlings, the rail guards at the rear fuselage were bent. Anyway, just some gentle coaxing straightened them back.

Next up are the engine nacelles. Again the black-moulded parts were painted beforehand, this time with Burnt Iron. The nacelles are of multi-part assembly and some study of the assembly guide is needed to avoid mistakes. I painted the strip behind the sensor domes USAF Blue Grey (FS 32537) before adding the long, thin booms. As adding the thrust vanes at the end of the boom involved some fiddly handling, they were cemented (the glue, apart from securing the vane to the boom, also allow some friction allowing easier handling, at least to me!). Parts A5, A10 and B23 which are the landing gear doors, were also cemented as they did not securely fit into their slots plus I usually have my Star Wars models in flying pose. A piece of clear acetate was cut to shape and stuck to rear cockpit glazing while the central section of the canopy had the tab (to allow  it to be posed open) was cut. With that, the model is off to the paint shop.    . 

Painting and Decalling
Bandai's painting instructions are pretty generic and did not specify any particular brand. Browsing the internet, I came to the conclusion that USAF Light Gray (FS 36495) is the best colour. I used Vallejo 71.276 but added some variations. The exposed fuselage and the engine were painted 'neat' while the forward compartment and the sensor domes have the light gray added with white. I then checked with my Star Wars reference books on the colours of the pipings. The Star Wars Archive shows that the models used in filming have the same colour as the fuselage while the drawings in Star Wars Vehicles show them to be of a different colour. Diverging from erm, 'Canon' into 'Legends' the pipings were painted differently - some FS 36495, while others in Gunze Iron 2 and a mix of Gunze Brass and Silver.  The canopy frames were painted the Tamiya mix for US  BLUe Gray but somehow they were too dark for my liking - I lightened it up further with more Flat White. The few decals present were then applied as per the usual method. I intended the Y-Wing to be a rather generic Gold Squadron craft that took part in the Battles of Yavin and Scarif as depicted in the movies. So, the rather distinctive 'burn marks' were not added, just some 'carbon deposits' using Tamiya Weathering Master 'Soot'..

Finishing
I started by adding the engine nacelles to the rear fuselage. Again, no gluing is necessary here. Afterwards, the pipings for the rear fuselage were added. They mostly went in without problem but some locating holes were apparently too small requiring a bit of surgery either to the hole or the rod. There are quite a lot of them and I took several sessions to finish them ( I am a bit slower of late!). The work went slower when one of them broke and had to be repaired. The pilot figure was painted and then placed inside the cockpit. Since it was added after the cockpit had been completed, it was nearly impossible to fit his legs and so the legs were amputated at shin level. It also needed to be cemented to the seat as there are no tab-and-locating hole as with other the other kits. The canopy was put in place and I found that there is a gap between the rearmost canopy panel and the rear transparency. The model then received a wash with heavier application being done on the rear fuselage and the engine modules.  For the astromech droid, I  chose the R5 to add a bit more splash of colour. The whole model was then sprayed with Mr. Hobby Topcoat Flat Clear to finish. 

Conclusion
The geek in me continue to be awed by the range of Star Wars kits from Bandai. The details are well done while the construction is quite a snap (pun intended). My only comment with the kit was the rather disappointing fit of the pipings but the again, it might be just me. Anyway, building it was a breeze and allowed me to have a peace of mind before heading back into building another 500+ parts kit . Oh I forgot to mention about the turbolaser turret included in the A-Wing kit. It remain unbuild as I intended to display it together with the Y-Wing and an upcoming T-65 X-Wing fighter.