Historical Background

At the outbreak of the Great Patriotic War in June 1941, the Red Army possessed large numbers of light tanks even though events up to that time pointed to the general weakness of the type. Wartime experience eventually cause the final decline of the light tank, but until 1943, it remained a significant part of the Red Army's inventory. This was caused by a number of reasons: firstly, to make up for the catastrophic losses in 1941 and 1942, as any tank is better than no tank, or as Stalin put it : "Quantity has its own quality". Secondly, it was cheap and easy to produce, and finally, because of its inherent simplicity, it can be built at less specialised factories especially at the time the major tank manufacturing plants were being relocated to the East, disrupting the production of the more capable T-34 and KV series. Once the factories have been re-established, the more powerful and battle-worthy tanks were preferred. This, coupled with the increased protection and firepower of the German panzers caused the role of the light tanks to steadily decline and production of the last type, the T-80, was ended in autumn 1943.
Before 1941, the Red Army was equipped with a number of models of light tanks, from the reasonably armed T-26 to machine gun-only armed T-37 family. In 1941, after facing the disastrous losses at the hands of the
Panzertruppen during Operation Barbarossa, Zavod No.37 under the guidance of its head designer, Nikolai Astrov, produced the T-60 light tank. While better in many respects than the earlier T-40, it was still armed with a 20 mm cannon, a weapon totally inadequate against the Germans' Panzers III and IV, especially when used as a combat tank. It was so bad that it was nicknamed 'A Brother's Grave For Two'. In an attempt to remedy some of the shortcomings of the T-60, Nikolai Astrov designed a new light tank with a more powerful armament, a more robust armour and greater mobility than the T-60. The new tank, designated T-70 was put into production in March 1942. The first batch was built with a GAZ-202 engine on each side of the hull , each powering one track. This was seen to be a serious defect and was quickly redesigned as T-70M with the engines in-line on the right side of the tank. The turret was redesigned so that the armour plates can be easily welded together and was moved to the left side of the hull. The T-70 was built at Zavod No.37 and No.38 at Kirov and GAZ at Gorky. While the ZiS-19BM 45 mm gun and 45 mm of frontal armour were improvements over the T-60, the better armament of German tanks such as L/60 50 mm gun of the Panzer III and L/43 75 mm gun on the Panzer IV negated them. Furthermore, the T-70 was still equipped with a one-man turret, overburdening the tank commander, who also has to act as the loader and the gunner.
The T-70 participated in numerous battles but none bigger than the Battle of Kursk. On 12 July 1943, at a front 32km wide in front of the village of Prokhorovka, 429 panzers of the II SS Panzer Corps and III Panzer Corps clashed with 870 tanks, including 261 T-70s, of the Soviet Fifth Guards Tank Army. A report by the 5th Guards Tank Army on 16 July 1943 listed 89 T-70s as total losses with another 56 still under repair. Following the battle, the T-70 were gradually withdrawn from combat and were relegated to secondary duties. The T-70 was further developed into the T-80 but interest in light tanks had waned and only 120 were built. The T-70 also formed the basis of the SU-76 self-propelled gun and the prototype-only T-90 anti-aircraft tank. In all, 8,226 T-70s were built.
MiniArt, from Ukraine, has come out with a number T-70 kits : T-70 Early production (with figures), T-70M Late production with figures, T-70M with ZiS-3 76.2mm gun (with crew) and PzKpfW T-70 743(r) with ZiS-3 (with crew). The 'Special Edition' is the latest of the T-70M gun tank kit, it came without any crew figures but have a PE fret not available with the other boxings. Also both early and late versions of the T-70 can be build from this kit. The kit consists of 356 parts in light grey and clear plastic and also PE. 176 of those parts are the separate link tracks - they look nice but have ejector pin marks on either side of the inner face. The rest of the parts are well moulded and have no flash.

For those uncomfortable with PE, there are original plastic parts to use but, of course they have less detail and look less realistic. The decal sheet was printed by Begemot and feature markings for nine tanks, mainly from that most famous of military formation in scale modeling : 'Unknown Unit' (Haha!). My previous experience with Begemot decals was very positive and I have no doubt these would work well too. The instruction sheet was printed on gloss paper and the drawings somewhat reminded me of Bronco kits. Apart from the usual construction steps, the instruction sheet is also needed for locating parts numbers as none were moulded on the sprues.
Construction

As with many AFV kits, the MiniArt T-70 is also conventional in its build approach. As usual, the hull received the first attention although MiniArt deviated slightly by having you build the upper portion of the hull first. Me, being a traditionalist, started with the one-piece lower hull. Once all the suspension arms were in place, I have to set the lower hull flat on the modeling table to ensure that all of them were in alignment. Moving on to the upper hull, I first cut a hole in the engine compartment, in order to use the PE parts. The resulting hole was then cleaned up and I installed the PE vent flaps (or whatever it was called). They were then painted steel, along with the compartment on the right-hand side. Then the PE grilles were superglued onto their places. Having already decided beforehand to build a late production vehicle, I used the indicated parts to assemble the driver's hatch. Afterwards, the rest of the hull parts were cemented, save for the spare wheel, exhausts parts, track guards and all the on-vehicle equipments.
The turret assembly were next. MiniArt provided no interior detailing save for the gun breech, co-axial machine gun, gunsight and periscope. Like the driver's hatch, there were different mantlet covers and periscope hatches for early- and late-build vehicles. The co-axial MG barrel was delicate and care was needed in handling it. The turret's interior was painted XF-71 IJN Cockpit Green. Then it was assembled and set aside. As the kit included PE parts, the partially assembled model was sprayed with Tamiya Grey Surface Primer.

I intended to build a vehicle in winter and to ease the weathering process, I decided to weather the hull before attaching the tracks. To create mud, I used modeling paste mixed with water, Mig Productions' African Earth pigment, Tamiya XF-64 Red Brown, along with fibre from a broom (I'm a cheapskate, plus the fibre resemble static grass) and dabbed them all over the lower hull. When dry the 'mud' went lighter so I haphazardly add some more Tamiya XF-64 over it. The wheels were mounted onto their places with some difficulty as the fit was quite tight. Then it was time to assemble the tracks. The tracks are well-moulded with good detail and, as stated before, with ejector pin marks on the inside surface. The tracks were sprayed Tamiya TS-1 Red Brown, cut off their sprues, cleaned and placed inside a plastic container prior to assembly. It should also be noted that the track links are quite fragile and I broke several of them, necessitating repairs as there were only 7 spare tracks (there were 84 links per run with a total of 168, MiniArt supplied only 176 links). Although non-workable, the tracks assemble easily using Tamiya Extra Thin Cement. Looking at photographs, some show that the tracks sag on the upper run while others showed them to be rigid. I decided to go mid-way, by only having a slight sag.

Before adding the track guards, I decided to weather the upper run of the tracks first, as there is only a little room between the track and the guard. Once done, the track guards were cemented into place. The left hand guard was slightly bent so I used superglue at the particular area. The track guards have reinforcing bars, four per side. Like the tracks, the bars are quite fragile and I broke three on the left side before deciding to cut the off the sprue using my hobby knife instead of the cutter. Finally, the storage boxes on the left track guard were glued. MiniArt provided delicate yet well detailed PE hinges and clasps...but I chickened out and left the boxes as they were.
It should also be noted that the instructions mislabelled some parts and a few other parts were not called for in the instructions. Parts D15 were labelled as D14 while Part D2 was simply illustrated as being on the back of the turret without any instructions to put it there.
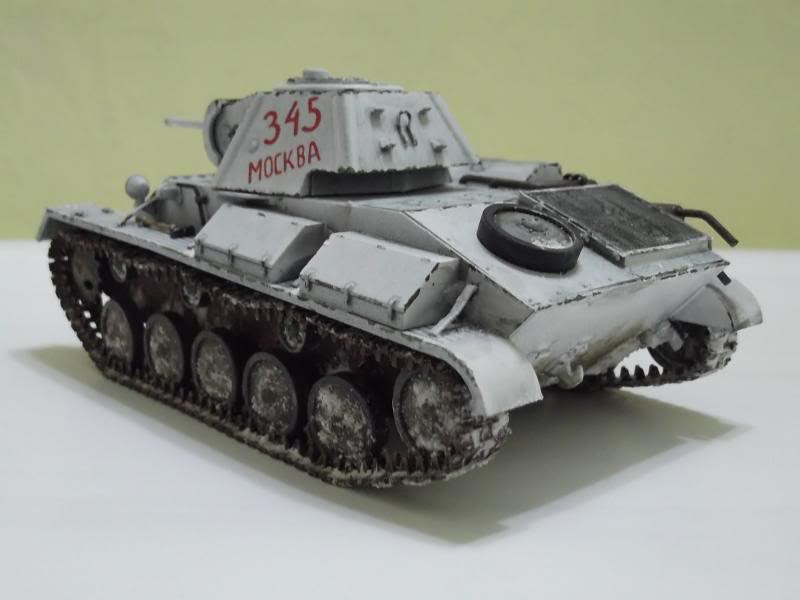
For kit markings, I chose #8, a late production T-70M, Eastern Front, Kharkov, Winter 1943. The tank was painted white overall save for two patches on the turret sides and the lower hull. For the base colour, I used Tamiya XF-67 NATO Green, painted without taking into account scale effect. Although originally thinking of applying the 'hairspray method', I decided to simulate an early winter white camo - not yet washed out but having chipped at the edges. The hairspray method can of course be used for this course of action but I decided to micro-paint the exposed inner layer. After masking, the model was sprayed Tamiya TS-1 Matt White. Once dry, the masking was removed and and using the smallest brush I have, I repainted the NATO Green in irregular dots and dashes on the edges. Once dry, the decal was applied - just two of them, the fastest in my hobby so far!
Finishing
The remaining parts are now cemented onto the model. The pioneer tools were first painted XF-59 Desert Yellow for its wooden parts and Flat Black for the metal parts. The metal parts were then 'metalized' using graphite. The same treatment was done to the co-axial machinegun. The exhausts were painted burnt iron and later were coated with Tamiya Weathering Master Rust. The spare wheel was affixed to its place. Even though the instructions seem to suggest that two wheels were to be placed, it seem that only one was needed, based on the rest of the instruction diagram. Once all the parts were in place, the model was subjected to the washing process. This time however instead of black-brown, I used a blue-black mix.

Once dry, I applied Tamiya Weathering Master Snow randomly and haphazardly, suggesting an uneven wear of the whitewash paint. I then mixed a bit more of the mud mixture and dabbed them on the wheels and the lower front and rear hull and used Tamiya Weathering Master Mud to blend the colours. Next, for snow, I mixed baking powder with water and white glue and dabbed them on the tracks and parts of the hull. The excess was removed from the more obvious places such as track joints. No figure was included in this built as there were none provided in the kit and those in my stash were more appropriate for warmer months of the year. However I may include one in the future, so the turret hatch was cemented just enough for it to stay in place but can be easily pried open when needed, And that concludes the built.
Conclusion
This was my first MiniArt kit and I can say that I'm very pleased with it. Yes, there were some problem such as the fit of the wheels, the fragility of the track links and missing labels and pointers in the instructions but the experience was generally a positive one. The inclusion of the PE parts gave better details for this particular release, although I negated it somewhat by not using a number of them. It should also be noted that some modelers mentioned that the track is wrong for a T-70M (or for that matter, the SU-76 and T-80), so MiniArt has come up with a track-link set to correct this. I am however satisfied with what came inside the box and am thinking of buying their Valentine tank and AEC armoured car kits. On a more sombre note, MiniArt is located at Simferopol, Crimea, smack in the conflict zone between Russia and Ukraine and there is a possibility that production might be interrupted by the crisis.


No comments:
Post a Comment