Saturday 11 August 2012

Rook-ie Shturmovik


Historical Background
In 1968, after analysing the experience of Ilyushin Il-2 units during WW2, the Soviet Ministry of Defence decided to develop a modern descendant of the famous Shturmovik (armoured assault aircraft) in order to provide Close Air Support (CAS) to the Red Army. The Ministry decided that the contemporary Sukhoi Su-7, Sukhoi Su-17 and MiG-21 did not meet the Red Army's requirement for a CAS aircraft. The Fitters and the Fishbeds lacked armour to protect the pilot and essential systems and that their high speed made it difficult for pilots to accurately aim their weapons. In 1969, the Voyenno-Vozdushnye Sily announced a competition for a new battlefield CAS aircraft. Sukhoi submitted its T-8 design which was declared the winner against its Mikoyan-Gurevich, Ilyushin and Yakovlev rivals. In appearance, the T-8 resembles Northrop's YA-9 entry for the almost-similar USAF's A-X program (which was won by Fairchild's YA-10, which became the A-10 Thunderbolt II). The Su-25 is armed with a twin Gsh-30-2 30mm cannon and equipped with 11 hardpoints  for up to 4,400kg of disposable ordnance.

Production started in 1978 with the first operational squadron taking shape in May 1981. The Su-25 received its baptism of fire two months later when the 200th Independent Shturmovaya Air Squadron were deployed to Afghanistan. It was there that the aircraft received its 'Grach' (Rook) nickname.By the end of the Soviet occupation in 1988, 50 Su-25s were deployed in-theatre, carrying out 60,000 sorties. 21 were shot down by the Mujahideen guerillas (including one shot down by Pakistani F-16s when the Soviet aircraft strayed into Pakistani airspace). The Su-25 also saw service during the First and Second Chechen Wars, South Ossetia War in 2008, Iran-Iraq War, the Persian Gulf War, Ethiopian-Eritrean War, Albanian Insurrection in Macedonia, Darfur and the Ivorian Civil War.

The Kit
I bought the kit some time in 2003 from the old Miniature Hobbies shop at Midvalley Megamall. I read somewhere that this kit is actually reboxed Italeri kit. The kit comes in two light grey sprues, a clear sprue and a small decal sheet. Assembly instructions was printed in a rough paper which reminded me of my Primary School exam papers! On cursory glance, the panel lines appear crisp on the wings but rather deep and rough on the fuselage. Parts were also thickly moulded, including the wing trailing edges, the dorsal aerial and wheel well doors. The nose laser designator window is just a raised pattern (of the wrong shape!) and I believe that the entire nose looks plain wrong when viewed from the front. The cockpit parts meanwhile look rudimentary. Weapons were included but with rather rough details. The decals supposedly were for aircraft based in Afghanistan during the Soviet occupation but the decal placement guide were ambiguous. Paint instructions were for the port side and half of the wing only!

Construction
As usual with aircraft models, I started with the cockpit. This time however I opted for Neomega resin replacement cockpit set. The set consists of the cockpit tub, instrument panel, side consoles, control stick, K-36 ejection seat and the overhead armour plate. Cleanup was quick for the smaller parts but I took some time to cut off the pour stub from the cockpit tub and the seat. Some cutting had to be done to the original kit parts especially for the instrument panel cover. Prior to attaching the cockpit to the fuselage, I painted them in XF-23 Light Blue with the seat and dials in XF-69 NATO Black. The dials then received a single drop of X-22 Clear each to simulate glass. The seatbelts were painted XF-49 Khaki.The overhead armour did not fit well though so I have to putty the gap between the fuselage and the armour piece.

Fit for the rest of the kit was not terribly well especially for the fuselage halves - a large amount of putty was needed here. Fit of the wing to the fuselage is OK, although the wing trailing edges were thick. Although I didn't glue it at this time, I realised that the landing gears are to be butt-jointed, rather the regular post-and hole joint - have to use superglue here. The kit also provided the extended flare/chaff dispenser, first used in Afghanistan to provide countermeasures against Stinger MANPADS, which I used. Finally before getting to the painting stage, I attached the weapons pylons. And talk about weapons, the kit did not provide the muzzle for the cannons (it's either that or I lost the part somehow!).

Painting and Decaling (I)
As I have stated before, the instructions only showed camo pattern for half the aircraft only. The other half have to be sourced from elsewhere. As I was rather unknowledgeable about military camouflage application, I simply repeat the pattern shown on the instruction sheet for the 'dark side'. I used Tamiya XF-23 for the bottom and the camouflage were painted using Tamiya XF-64 Red Brown, XF-60 Dark Yellow and XF-58 Olive Green. Dieletric panels on the fin top and the front of the wingtips were painted XF-5 Flat Green.


Once cured, it's decaling time. As I have stated before, the instructions were quite vague about their placement. I was interested in using the 'sharkmouth' art but alas the instructions did not show which bort number goes with the option, or whether the 'rook' insignia is used or not. So I decided to use creative license and used 'Yellow 07' bort number and the 'rook' insignia on the left engine intake. However the Zvezda decals were translucent when applied...darn. So I thought to myself that this Shturmovik is a prime candidate for aftermarket decals! Despite that, I still finished the kit with ordnance loads (more of this later).

Painting and decaling (II)
A few years after I finished the Su-25, I came across Linden Hill 21st Century Shturmoviks decal sheet at Hobby HQ. The sheet features SU-25s from Soviet Union (during the Afghan War), Russia (Second Chechen War), Bulgaria, Georgia, Turkmenistan, Ukraine and Peru. So after a further wait, it was the Su-25s turn to be repainted.

I started by stripping off the paint using Kiwi Window Cleaner (any window cleaner with ammonia will do). But before that I detach the fixed ordnance load and put them aside. The decals were stripped using Dymo tape. This time I chose a marking from a Su-25 involved in the Second Chechen War in 1999, also with a sharkmouh on the forward fuselage and a tiger's head on each intake. And according to instructions, I painted the aircraft using RLM65 for lower fuselage (yeah, not accurate I think but it was the closest I could match), Tamiya XF-62 Olive Drab, XF-59 Desert Yellow and Gunze Light Ghost Grey. The Linden Hill instruction also missed showing the right side and upper wing surface patterns, but this time, thanks to the internet, I guessed the missing pattern by looking at photos of Su-25s in service (though not of the actual aircraft).

'If anything that can go wrong, will go wrong' - it happened this time. While I was applying the sharkmouth decal, it folded against itself and I can't get it right again. I decided to do the first option, 'Red 05' also from Chechen War but with a wolf's head nose art. However this aircraft, whilst having the same camo pattern as 'Red 27', has its Light Ghost Grey parts in light green. Having stripped the paint once, I'm not going to do it the second time. To compound my misery, I have already placed the 'Sukhoi wing' emblem on the tail and the Russian red stars (which was not painted on 'Red 05'). I decided to apply creative license  again. After googling, I found that even 'Red 27' were painted differently from the decal instructions ( I guess the photo were taken at some other time). So, I made 'Red 02' using  the bort number from another option (the Turkmen aircraft!) whilst using the wolf's head nose art from Red 05!

Finishing
Once everything settled, I used a 2B pencil to mark out panel lines. I then reattach the canopy and ordnance.  The weapons were sourced from Dragon's Soviet Aircraft Weapons Set 3 : Rockets And Bombs. I arm my Su-25 with four UB-20-80 rocket pods and four PROSAB-250 cluster bombs. The two R-60 missiles came from the kit. As luck would have it, I broke the portside pitot tube...No matter though as I replace it with one from the-now cannibalised MiG-23! Finally a spray of Flat Clear finishes everything.


Conclusion
Not my best effort, this one. The basic kit also have some problems especially around the nose. But I'm satisfied enough to have a modern Shturmovik in my collection. 

Tuesday 24 July 2012

New Mexican Bandits


Historical Background
In 1964, Soviet mathematician Pyotr Ufimtsev published a seminal paper in which he showed that the strength of a radar return of an object is relative to its edge configuration rather than the actual size. He demonstrated that he can calculate the radar cross-section across a wing's surface and along the edges. Therefore even a large aircraft can be made invisible (so to speak) to radars. However applying the theory would mean an aerodynamically unstable aircraft, and the computing technology of the 1960s were simply incapable to make an aircraft 'invisible' and flying at the same time.

By the 1970s, computing power had sufficiently advanced that Lockheed Corporation decided to look into Ufimtsev's research again. In 1975 they initiated a 'black' project with a model named Hopeless Diamond (a play on the (in)famous Hope Diamond because of its appearance) The following year the Defense Advanced Research Agency (DARPA) awarded a contract for two low-observable (stealth) demonstration aircraft codenamed Have Blue. In 1977, following the success of the program, the US Government increased its funds for operational stealth aircraft, under the codename Senior Trend and in 1978 Lockheed was awarded the contract to build them.

The Senior Trend aircraft (now designated F-117) remained secret until 1988 when a single grainy photograph was released to the public. The announcement confirmed the existence of the Stealth Fighter and also put to rest the earlier speculative 'F-19' designation and its 'Blackbird'(Lockheed SR-71)-like appearance. The F-117 were first used operationally during Operation Just Cause, the US invasion of Panama when two of them bombed the Rio Hato Airfield. The type's 'finest hour' came during Operation Desert Storm in 1991. Its stealth characteristics enabled it to fly to Baghdad and bomb strategic targets with virtually total impunity. In fact Iraqi AAA fire only started AFTER the bombs hit their targets. Even then, television coverage showed that the shots were undirected as the radars were unable to find the elusive aircraft. The Nighthawk served in further conflicts and were finally retired in 2008. One was shot down by a Yugoslav SA-3 'Goa' SAM during Operation Allied Force in 1999. A total of 59 airframes were built.

The Kit
This is Academy's rendition of the Stealth Fighter in 1/72. The parts were moulded in black plastic and the clear parts were moulded in smoke-coloured plastic. Parts count is low, not surprising in 1/72 scale. The fuselage were moulded in upper and lower halves in its entirety. The ruddervators were in one piece whilst the wings are also in one piece with separate control surfaces. The parts for the weapons bay were simplified. Armament options consist of a pair of AIM-9 Sidewinder, a pair of Mk84 2,000lb GP bombs and a pair of  GBU-10 Paveway II LGBs. I was disappointed that Academy did not include the more normally used GBU-27 Paveway III LGB as in their 1/48 Nighthawk. Decals were provided for two aircraft : a machine from the 415th Tactical Fighter Squadron 'Nightstalkers', 37th TFW and 416th TFS 'Ghost Riders', 37th TFW. The latter option is adorned with 'bomb-door' art and mission markings underneath the cockpit coaming.

Construction
Out of the box, the cockpit is rather sparse. The control panels were represented by decals, which I shuld say, quite nice for the main panel but looked very decal-ish for the sides. The HUD however is a solid block of plastic. There is the clear plastic to represent the combiner glass. However since it was moulded in that smoke-coloured plastic, I decided to leave it off. I cemented the clear parts for the FLIR and DLIR apertures (in real-life, they are actually fine wire mesh rather than clear transparencies), the bomb bays and the wheel wells before closing up the fuselage. I have to put the landing gear in place (less the wheels) as it would be quite impossible to put them after the fuselage has been closed up - so I have to be extra careful during the painting and decaling stage. The simplified bomb trapeze were however left off until later. The elevons were butt-jointed onto the wing. However fit was not perfect so I have to put them at a slight downward angle.. Off to painting stage then....

Painting and decaling
Apart from a few of very early Senior Trend aircraft and on certain airframes later in its career, the F-117 were only seen in one colour : black.  I used Gunze H77 Tyre Black. The interiors and landing gear were painted XF-2 Flat White. And ironically the tyres were painted Tamiya XF-63 German Grey! I originally used the kit decals and I chose Col. Al Whitley's 'The Toxic Avenger'. As I have mentioned elsewhere, Academy's decals were hit-or-miss affairs; in this case a miss. They were rather thick and did not respond well to setting solutions. Thankfully an alternative was available at Hobby HQ : TwoBobs' 25th Anniversary Bandits sheet. So I stripped off the kit decals and substituted them with the aftermarket decals. I chose the markings for airframe 85-819, a machine assigned to the 8th Fighter Squadron, 49th Fighter Wing based at Holloman AFB, New Mexico. Printed by Microscale, the decals were beautifully thin and responded well to Mr Mark Softer.

Finishing
I attached the bomb trapezes, wheels and doors to their respective places. As I have said before, the kit did not include GBU-27 Paveway III LGBs. I have the option of bashing Hasegawa's GBU-24 Paveway III in my spares box into a -27 by cutting off the tail and grafted a new tail from spare GBU-10s and shortening the cuff between the bomb body and the seeker head plus shortening the canards. However I felt that this was too much for me and decided to simply replace the kit GBU-10s with Hasegawa's GBU-10 Paveway II.


Conclusion
A simple kit for one of the most significant combat aircraft in history. Fit is good although I have reservations towards its decals (then again maybe it's just me). OOB its good enough and is a good alternative to the more expensive Hasegawa kit. My biggest gripe were concerned with the lack of GBU-27 bombs and the solid air intakes.

Note
1. Prior to 1988, the Nighthawk was speculatively known as the F-19. The reason was that it filled the gap between the F-18 Hornet and the (ultimately defunct) F-20 Tigershark. Artist impression showed to be a blended-body type aircraft  la the SR-71. The F-117 designation, although out of sequence of the contemporary US aircraft designation, actually helps in its then secretive nature as the Soviet aircraft evaluated by the USAF were given designations in the 'Century Series' range (the MiG-17 and -23 were known as F-113, for example). So the F-117 can then be simply dismissed as another Soviet aircraft.


Wednesday 4 July 2012

Latin Arrow


Historical Background
In 1936, the Regia Aeronautica issued a new specification to Italian plane manufacturers for a new monoplane fighter powered by a single radial engine, a top speed of 500km/h, climb rate of 6,000m in 5 minutes, a flight endurance of two hours and armed with two 12.7mm MGs. Macchi's renowned lead designer, Mario Castoldi responded by designing a modern monoplane fighter with low-set, all-metal cantilever wings, retractable landing gear and enclosed cockpit. Power was provided by the 870hp Fiat A.74 radial engine. Flight testing started from December 1937 and production started in June 1939. The plane was shown to be highly maneuverable although underpowered and once the shooting starts, undergunned.

Mario Castoldi was the Italian equivalent of Reginald J. Mitchell, the designer of the Spitfire. The Saetta was actually the descendant of Macchi's pre-war Schneider racers, the same way the Spitfire descended from Supermarine's S.6B. However, unlike the Spitfire, the relatively low-powered engine  (just 870 hp) and poorly-designed cowling restricts its performance. To make matters worse, the official requirement emphasised visibil Dtormo.ity over aerodynamics resulting in an ungainly hump-backed appearance. Nevertheless the Saetta has the best performance among the first-generation Italian monoplane fighters. The first batch of the C.200 (now nicknamed Saetta - 'Arrow') was delivered in August 1939 to the 10° Gruppo of the 4° Stormo. The pilots of this elite unit however opposed the adoption of the C.200, preferring the more manuverable Fiat CR.42. The fighters were then transferred to the more receptive 6° Gruppo of the 1° Stormo and 152° Gruppo of the 54° StormoEarly series of the Saetta were equipped with fully-enclosed cockpit with sliding canopy. However the pilots, having transitioned from open-cockpit biplane fighters such as the Fiat CR.32 and Fiat CR.42 Falco initially disliked it. So much so that aircraft from serie VII onwards were given a partially open cockpit.

The Saetta saw combat in June 1940 and gained a healthy respect from the Allied pilots. Basically having similar performance with the Hawker Hurricane, it possessed a better climb rate and could out-turn and out-dive the latter. The Saetta was later developed into the MC.202 Folgore with the Daimler-Benz DB601 engine with improved performance figures. 1,153 units were built  between 1939 and 1943 and fought over the skies of the Balkans, Mediterranean, North Africa and the Eastern Front. At the time of Italian Armistice, only 33 were available of which 23 were transferred to Allied airfields in southern Italy. The Saetta were only used for a sort time by the Italian Co-Belligerent Air Force although they soldiered on as training aircraft until 1947, despite severe sparts shortage. 

The Kit
Italeri released it's new-tooled 1/48 kit in 2011. The kit was laid out on two grey styrene sprues, one clear sprue, a small PE sheet and a small-ish decal sheet for four marking options (despite the 'Super Decal Sheet' claim on the box). Parts are nicely done (on the sprue) with clean (if a little deep) panel lines. The PE sheet is mostly concerned with the seat belt / harness, landing gear cover mounts and the alternative parts for the cockpit console. In short, a simple, nice kit to add to the rather neglected Regia Aeronautica  - but more of this later. The four markings options are :
1. 369a Squadriglia / 22° Gruppo Autonomo CT, Russia 1941
2. 365a Squadriglia Gruppo Autonomo CT, Napoli, Italy 1940
3. 85a Squadriglia / 18° Gruppo, Araxos, Greece 1942
4. 150 Gruppo Autonomo CT, Tirana, Albania 1941


Construction
As usual, construction starts with the cockpit. I elected to use the combination of decals and PE parts for the console. The interior was painted pale green using a mix of Tamiya XF21 Sky and XF5 Flat Green. The PE for the harness was the bended into shape and painted using XF64 Red Brown and XF16 Flat Aluminium. Once completed, the fuselage halves were closed up and it's here that I realize that something is not quite right with the fit. However, a little bit of filler sorted out the fuselage seam lines.

Add caption
Skipping the engine/cowling step first, I decided to do the wings. And this is where I realize that the trailing edge is rather thick and that there is quite a gap between the main wing structure and the flaps. When the tailplanes were attched, I also realized that that forward edge is rather out of scale. I chose to ignore them as this is an OOB built anyway. The engine and cowling were next. The parts for the engine were actually quite nice. There were some slight gaps for the cowling assembly its Ok with some filler. The fit of the entire assembly to the fuselage however was quite tight but I shaved off some plastic from the male joint on the fuselage and everything were alright. When I joined the wing assembly to the fuselage, the biggest gap occured at the trailing edge. Large enough that I spend quite a bit of filler and super glue to cover it. The easily breakable parts such as radio aerial, landing gears and pitot tubes were painted but were left off the model for now. I did dry-fit the MGs and to my dismay, I found that the the guns cannot be fitted parallel to the fuselage as the cowling was in the way, so the guns were later fitted in a slightly oblique angle.

Painting and markings
Italeri, like Tamiya has a habit of only quoting their own range of paints in their instruction sheet. However, since Tamiya also released this kit under their flag, I managed to get the Tamiya equivalents. I decided to do the first option with its 'scrambled egg' camouflage pattern. Besides, it was also the one with the most colourful markings. The underside was painted a mixture of XF66 Light Grey and XF2 Flat White. The green was painted using XF67 NATO Green. The scrambled egg pattern were painted XF59 Desert Yellow and XF64 Red Brown. The cowling was painted XF3 Flat Yellow.

Once dry I started to apply the decals. The kit's decals were printed by Cartograf so the quality is great. I'm not sure about the 'title plate' (my description of the inscription 'Macchi MC200' and the empty and full weight info) at the base of the fin, though. Photos on the internet shows that it is yellow whilst the kit decal is in blue. The decals were then subjected to the Mr Mark Softer treatment.

Finishing
The small bits such as pitot tubes and radio aerial can now be attached - less the venturi tube on the starboard side of the fuselage, which was devoured by the Carpet Monster (Arggh!). This was followed by the propeller and the cockpit transparencies. The windscreen is OK but the side windows have less than perfect fit. The almost complete kit was now subject to sludge wash and afterwards I subjected the model to a final spray of Flat Clear.

Conclusion
Despite its shortcomings, Italeri should be congratulated for bringing another of Regia Aeronautica's mainstay fighter during the early part of the war. Previously, the only Saettas in this sclae are the limited run Pacific Coast Models and Classic Airframes kit. Having said that, Italeri should really pay better attention to their quality control - I heard that their Reggiane Re.2002 Ariete were terribly received by modelers....

Saturday 16 June 2012

Smokey Bandits Of Kuantan


Historical Background
The MiG-29 (NATO codename Fulcrum) was designed and developed in the Soviet Union to counter the (then) new American fighters like the F-15 Eagle and the F-16 Fighting Falcon. With the basic aerodynamic shape designed by the Central Aerohydrodynamic Institute (TsAGI), the MiG-29 was developed in tandem with the larger Sukhoi Su-27 ‘Flanker’.  Parallel to the American FX and LWF programmes, the Fulcrum can be considered the F-16 (which beat the YF-17 in the LWF programme) of the Soviet Air Force as it was the lighter of the two.

The Fulcrum entered service in 1983, replacing the MiG-23 Flogger in the frontal aviation role. Their task is to escort strike and attack aircraft operating close to the frontlines. For that, it was equipped with rugged landing gear, mud/stone guard for the forward landing gear and special intake covers (which close the intake when the gear touches the ground – air is then aspired via auxiliary intakes above). The Fulcrum with a single 30mm GsH-301 cannon plus six hardpoints on the wings which are usually armed with two R-27 (AA-10 Alamo) and four R-73 (AA-11 Archer) for air-to-air combat.

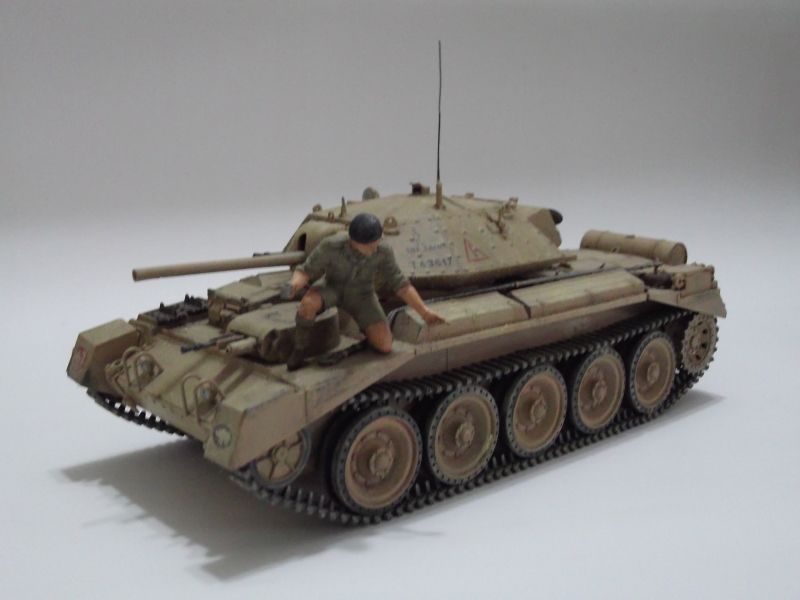
In 1993, the Malaysian Government announced that  the Royal Malaysian Air Force were going to acquire MiG-29 as its air superiority fighter replacing (supplanting?) the Northrop F-5E Tiger II. This was quite a surprise as Malaysia traditionally acquire its defence equipment from Western countries. A total of 16 MiG-29S (Product 9.13) single seaters and 2 MiG-29UB (Product 9.51)  tw0-seaters were purchased and are based at Kuantan AB in the state of Pahang. The planes were known locally as MiG-29N. Some modifications were made including the fitment of detachable inflight-refuelling probe (single-seaters only), deletion of the SRO-2M Khrom (‘Odd Rods’) IFF antenna and replacing the radar with Phazotron NO19ME which is compatible with R-77  ‘AMRAAMski’ air-to-air missile. The engines remain Klimov RD-33 which emits black smoke visible for kilometers around. Because of that, like the American pilots who flew the F-4 Phantom, the pilots adopted the nickname ‘Smokey Bandits’ for their mount.


The Kit
In 1/72 scale, the modeling community generally agrees that Italeri has the best kit of the MiG-29. The general shape captures the look of the real thing as compared to its competitors.  Detail-wise, the kit is good, although not as good as Hasegawa’s or Fujimi’s though. The cockpit is basic and the K-36 seat is best discarded and replaced with aftermarket parts. There is no intake trunking (good thing the Fulcrum closes its main inlets once it’s on the ground!)*. Stores consists of two R-27 and four R-60 (AA-8 Aphid) missiles.

Oh, I forgot to mention that this build is actually a REBUILD. I had already build the kit around 2005 using the aforementioned Bats, Typhoons and Cobras set and also Scale Nutz’s TUDM MiG-29N sheet. So this entry will include both the original steps taken by me and the additional work done during the rebuild.

Construction

As usual, the cockpit received the first attention. As stated before, the cockpit is very Spartan with just the seat, control stick, tub and the instrument panel. There is some detail on the tub sides but none on the wall. The cockpit is painted Gunze H307 (FS36320) with available details picked in Tamiya XF-1 Flat Black. The kit seat was discarded and replaced with the resin one from Pavla Models. However when I test-fit the seat, I found that it sticks way out of the cockpit coaming. The reason? The original seat’s placement tab (or whatever it’s called). I can’t reach the spot to hack it off so I did the next best thing: hack (or rather, sand) the resin seat’s bottom! The seat was then painted XF-1 Flat Black with seat belts painted XF-57 Buff. Some dry-brushing were done on the ‘metal’ parts of the seat.

Closing up the fuselage is quite tricky and as expected, there is some gap especially around the nose area. Some CA glue was used to fill it and then sanded down although my sanding skills leave something to be desired…..There is also some gap at the wing-fuselage joint but this was easier to overcome, especially when I use Mr Dissolved Putty.

The IFR probe was then mounted on the left side of the fuselage, located just above the cannon muzzle. There is no exact instruction actually so I just make a guess based on photos. The addition of the IFR involves another addition to the airframe – fuel line from the probe to the tanks. Part of the line is visible externally just behind the left auxiliary air inlets. VFA Prods instructions kindly provided this information and I use  a 1.0cm plastic rod to represent the pipe. The ‘Odd Rods’ IFF antenna were then sanded off but I refrain from adding antennas to avoid breakage during painting and decaling (it happened anyway later on!). So, off to the painting stage!

Painting and Decaling
When I bought this kit and the decal sets (originally Scale Nutz's 'TUDM MiG-29N Fulcrum' and VFA Productions' 'Bats, Typhoons and Cobras!'), the RMAF Fulcrums were painted in grey/green camouflage with lo-viz markings. So I painted the model according to the instructions, although I didn't paint the green areas in FS34227 as recommended but using FS34226 instead. I use both sets of decals (where appropriate)although with hindsight I believe Scale Nutz's stencil decals is more in scale (although not really legible).


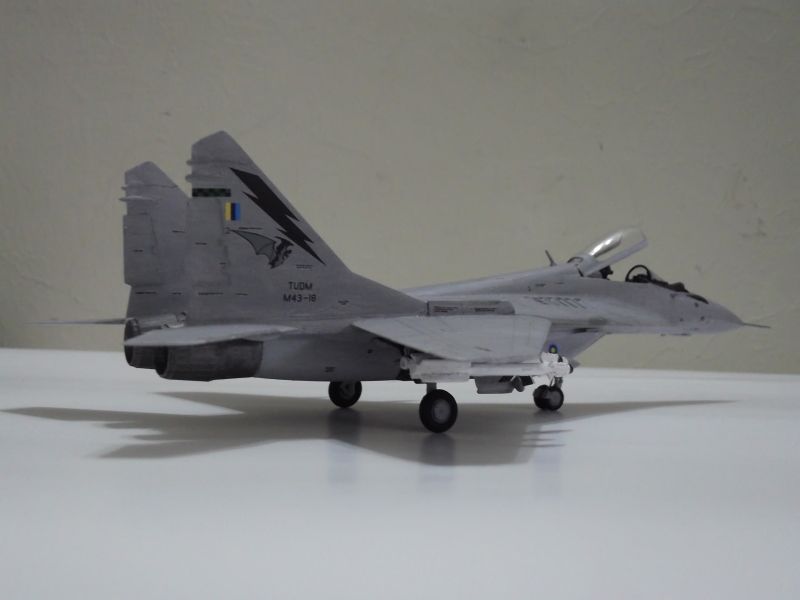
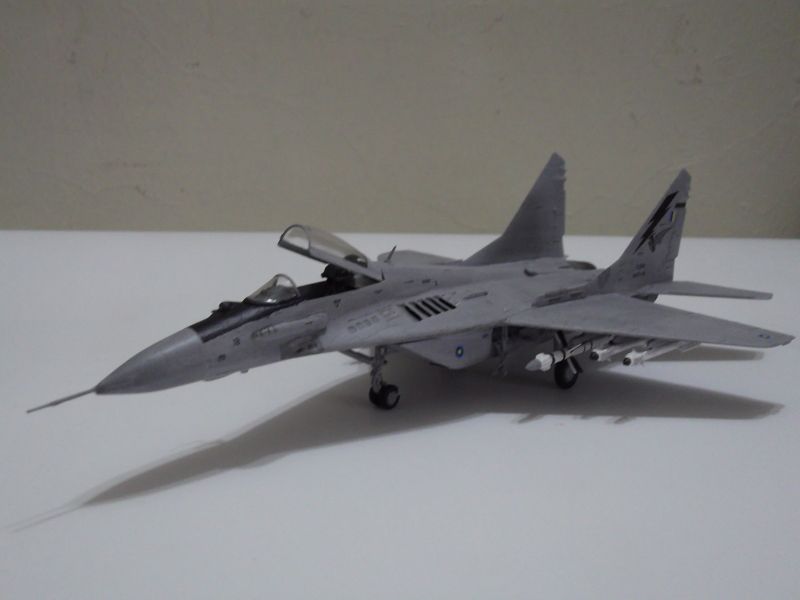
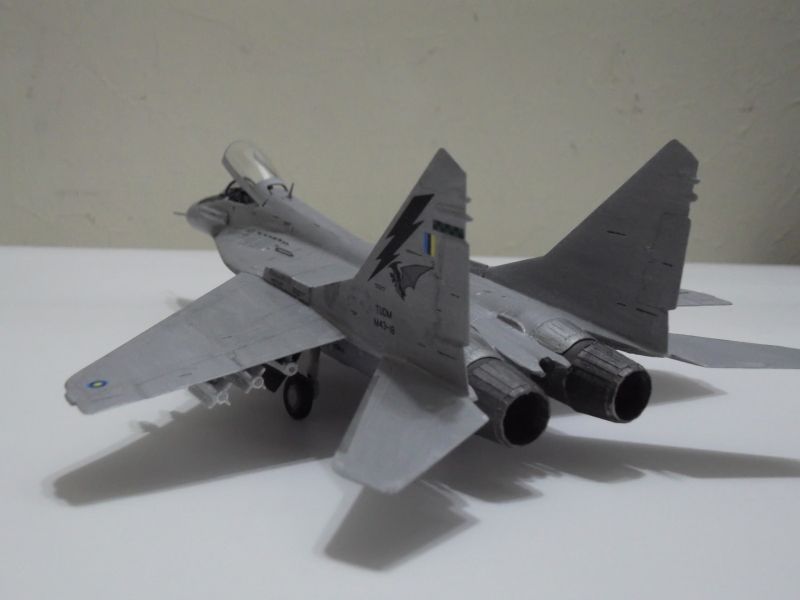
In 2005, after their SLEP, the Fulcrums were painted Air Defence Grey, the lo-viz national markings were changed to full colour and are made into a circle (it was square previously). There was also fin flash (like all other RMAF planes). To reflect these changes, VFA Productions issued their 'RMAF's Russian Connection'** set. This set also includes their earlier RMAF Fulcrum decal set although the resin IFR probe is not. I bought this set but sat on it until earlier this month (May 2012). 


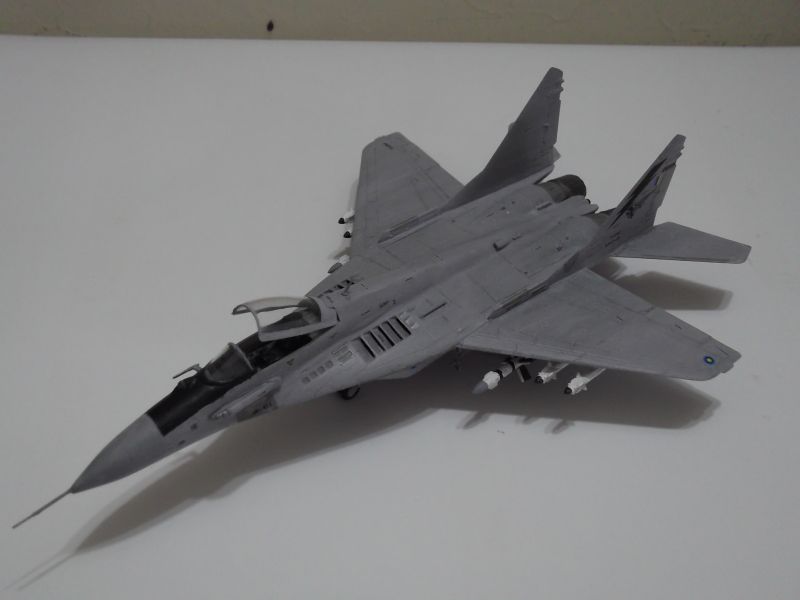
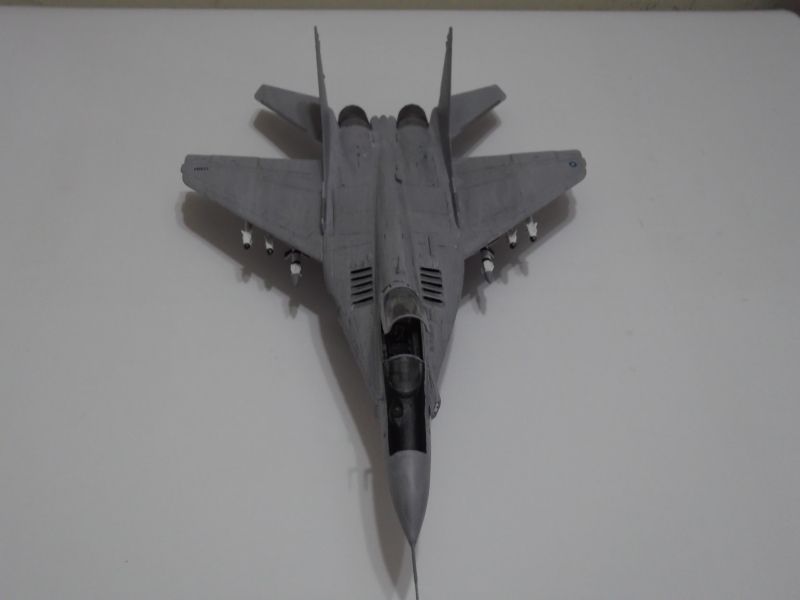
Eventually I decided to repaint my MiG-29 in their new colour scheme. I stripped the old paint off using window cleaning liquid. However, instead of the scheme depicted in the VFA Sheet, I decided to paint my MiG in their post-2007 markings. There were no bat insignia in that sheet so I have to use the leftover decals from their earlier sheet. The aircraft is painted Medium Sea Grey using Gunze H335. The post-2005 colour scheme is peculiar in the sense that everything, including the wheel wells and landing gear were painted Medium Sea Grey. The leading edge of the horizontal stabiliser and the chaff/flare dispenser were painted silver and the exhausts were painted burnt iron. Then off with another of my love-hate relationship in modeling : decaling the numerous stencils. Well, at least I'm not doing any of the JASDF jets! The decals were then subjected to Mr Mark Softer treatment. The pilot's name decal was not used as the 2011 birds feature a different style, with callsign.

Finishing
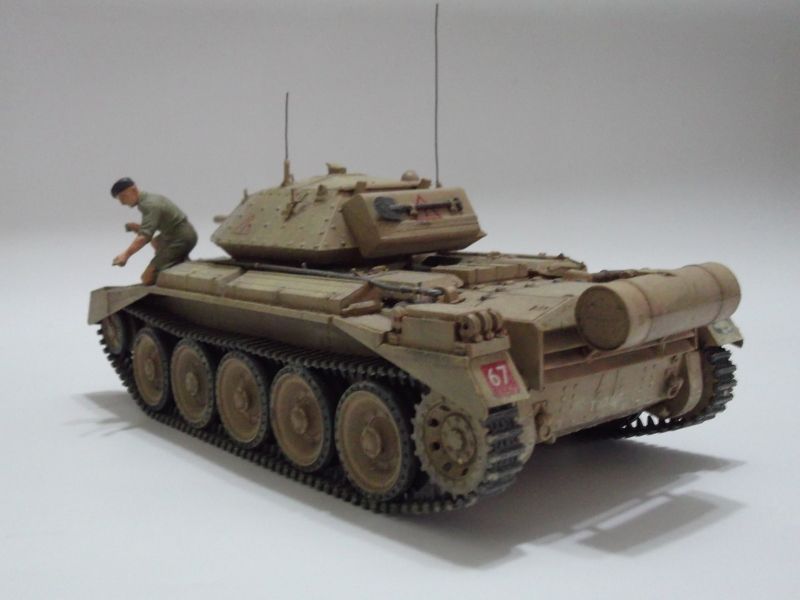
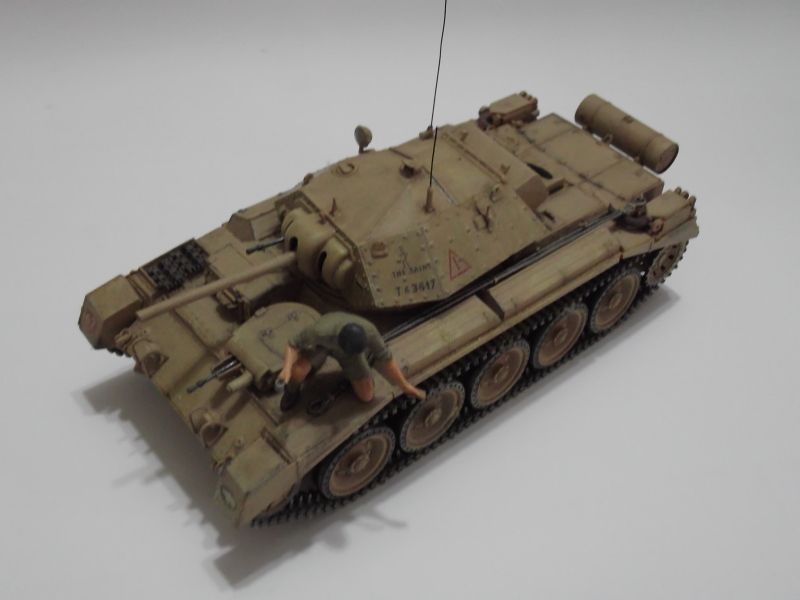
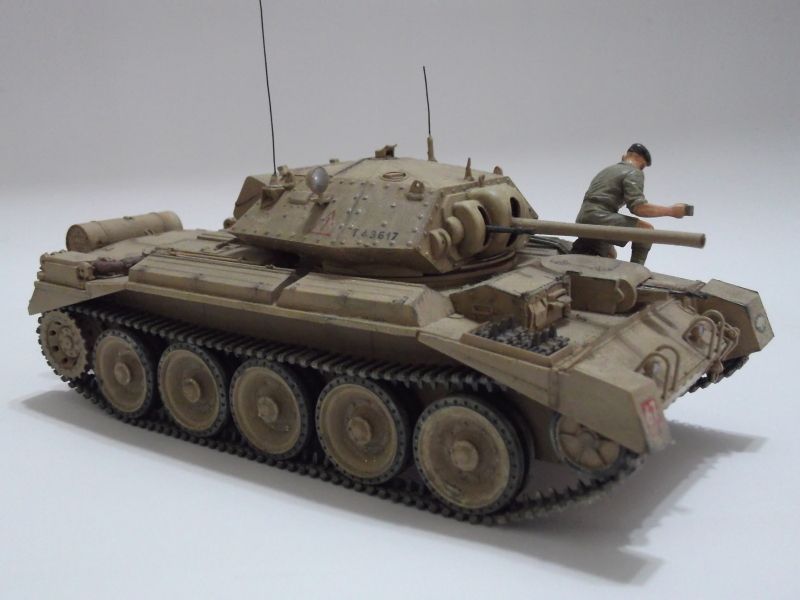
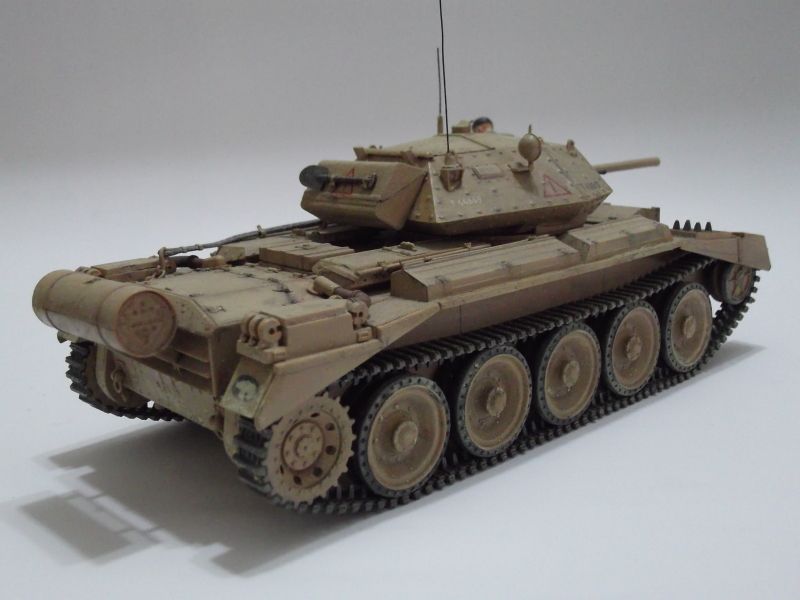
 At this stage of build, I attached the external stores, aerials, probes and the landing gear. The kit didn't include AA-11 Archer AAMs, so these were sourced from the rather rare Dragon Modern Soviet Aircraft Weapons 2 : Air-To-Air Missiles. The missiles (AA-10 and AA-11) were painted in 'live' rather than 'inert' markings. The VHF aerial behind the cockpit was sourced from Zvezda's MiG-23MLD kit, as is the air data probe on the starboard side - the originals were lost to the Carpet Monster. The canopy transparency on the real aircraft was sealed with pink-coloured tapes, which I didn't replicate as it was quite diificult in 1/72 scale. And true to Krapp Plastik Werke traditions, I only realise (after attaching) that the 'black' portion of the AA-10s are actually dark natural metal....and that the paint for the entire aircraft was not smooth and attempts of repairs resulted in discoloured patches not present on the real aircraft...arghhhh.

Conclusion
Italeri, despite being generally regarded as behind the Japanese Big Four (Tamiya, Hasegawa, Aoshima and Fujimi) in kit design actually surpasses them in their 1/72 MiG-29 kit. Out of the box, it was good enough for your average modeller whilst detail freaks have lots of aftermarket stuff for this kit. I am very grateful for Scale Nutz and VFA Production's effort to cater for the local interest in the aircraft especially the latter's inclusion of the IFR probe.

Note:
*The intake covers swing down when the engines are running. Once stopped, the covers retracted again. 
** When originally delivered in 1993, the planes were divided between two squadrons; No. 17 (Bat) and No.19 (Cobra). No. 17 was disbanded in 1999 and its planes were absorbed by No.19 Squadron. When TUDM purchased Sukhoi Su-30MKM MRCAs in 2003, the old No.11 Squadron (last operated the F-5Es in the early 1990s) was resurrected. No.11 also has a Cobra as insignia and as the Sukhois are now the premier combat aircraft of TUDM, No.19 Squadron was required to relinquish its identity to No.11 Squadron. No.17 Squadron was resurrected as a result.

Friday 4 May 2012

Cruisin' Crusade

Italeri 1/35 Crusader Mk. II


Background
The British Tank, Cruiser, Mk VI Crusader was one of the most important tanks during the North American campaign. It was designed by Nuffield Mechanisation and Aero Ltd in parallel with Tank, Cruiser MK VI Covenanter. The Crusader was part of of the lineage of British cruiser tanks, from Cruiser Mk I to the post war Centurion. Unlike earlier cruisers, the Crusader was fitted with five roadwheels for each side in order to improve weight distribution. The first two marks of the Crusader was armed with Ordnance QF 2-pounder/40mm gun - effective only against the early marks of German tanks until replaced with the Ordnance QF 6-pounder/57mm in the Mk III. The early mark Crusaders can also be distinguished by an auxiliary turret on the left hand side of the front hull. Armed with a Besa 7.92mm MG, the turret was awkward to use and traps propellant gases inside the tank. In practice the turret was usually removed in the field or left unoccupied.

The Crusaders were first used during Operation Battleaxe in June 1941, losing numbers of them to enemy anti-tank fire and mechanical failure. Although faster than the Axis tanks, the Crusader suffered a number of drawbacks. Chiefly they were only issued with AP shells (so that the gun cannot be used against unarmoured and exposed targets such as anti-tank guns and their crews), thin armour, the design of the turret which created shot traps and mechanical unreliability. As combat tanks, the Crusader served until the end of the North African campaign but was increasingly replaced by the American Grant and Sherman tanks. Later on the Crusaders were converted into mobile AA gun platform and gun tractors.

The Kit
Italeri came out with this kit in 2001 as 'Crusader Mk II' on the box and 'Crusader MK I/II' on its instruction sheet. Moulded in desert sand colour, the parts have crisp details although not to the level of Far East companies. There are no details inside the turret although there is quite good detailing for the auxiliary one (why?) There were also no figures and the markings are only for one tank, nicknamed 'The Saint'. No info was given as to the 'ownership' of that particular tank. Checking on the internet however showed that that particular tank belonged to the 10th Royal Hussars Regiment of the British 1st Armoured Division in North Africa. Track is of the 'rubber-band' type and quite stiff.

Construction
Construction is easy and pretty straightforward. Fit is generally very good although there are a few areas that needs filling and sanding. I choose not to open the turret hatch so that the empty interior is hidden. Anyway, when the gun mantlet is glued, you can still peer straight into the (empty) interior! The rest of the kit is built to the letter (even though online reviews stated that the kit is actually a mish-mash of Marks I and II Crusaders). The gun is overscale since the actual 2-pounder/40mm is rather small (especially when I put the Crusader next to my new-mould Tamiya Matilda and even Italeri's own Staghound armoured car). Another complain is that the tow cables are unconvincing, however they are pretty soft so that they can be persuaded to conform to the contours of the tank (but still looks unconvincing!). The thick plastic radio aerials were replaced with copper wire.

Since the detail is nowhere the level of Dragon kits, assembly is pretty quick and it's off to the paint booth.

Painting and Decaling
The tank was painted XF59 Desert Yellow overall. The MGs were painted XF69 NATO Black and once dry, rubbed with graphite powder. Tracks were painted XF64 Red Brown. Once everything is cured, the tracks were mounted onto the chassis. Since Crusaders have 'dead' tracks and that the kit tracks is stiff , I superglued the top run onto the roadwheels. The tank then was ready for the decals. As I mentioned before, there is only one set of markings. The decals are actually quite nice and it settles with help from Mr Softer. The tank was then subjected to the usual wash process, followed with some weathering, mainly the application of 'dust' using Tamiya Weathering Master.

Figure
There is no figure included in the box. Of late however I like to add figures to my models for  scale effect. The figure used here came from Masterbox's Commonwealth AFV Crew set. I chose the one in the pose of passing/offering something (ration or cigarette pack). He was painted using techniques shown in the Track-Link website which I modify a bit to suggest tan (he's in the desert, remember?). The figure was then placed onto the left glacis plate of the model.


Conclusion
This is an easy kit to build, a perfect follow-up to a 600+ part Dragon kit you have finished before!