Fictional / Real-World Background
Koensayr Manufacturing BTL series of starfighters, better known as the 'Y-Wing' can trace its origins to the early Clone Wars era. The Galactic Republic commissioned the type as a combination of fighter and long-range bomber to supplement the V-19 Torrent and Delta-7 starfighters. Acquired by Jedi Knight Anakin Skywalker in an unsanctioned mission to retrieve the still-prototype craft, the BTL-B was used in an attack on General Grievous' flagship, the
Malevolence. The success of the attack by the Shadow Squadron prompted Koensayr to develop other variants of the craft, including BTL-S3 and BTL-A4. The original BTL-B established the shape of the series with two large ion jet engines with their characteristic nacelles. The engines were carried by a cross wing which connected to the cockpit module on a central spar. The BTLs have a tendency to run hot which necessitated a complex cooling system throughout the craft.
Although production has started, the end of the Clone Wars and the rise of the Galactic Empire stopped any further production as the new Imperial Navy shifted towards capital ship-based space superiority doctrine. As Koensayr lost their government contracts, the surplus stock of BTLs were sold to local planetary defence units although Imperial intervention caused many units remain unsold, being repossessed or sent to the salvage yard. As the BTL-B models were scrapped first, this made the -A4 version being the most numerous of the fighter. These idle craft became the focus of the nascent Rebellion in order to arm themselves. BTL-A4s were either purchased, or most of the time, stolen from military surplus dealers and scrapyards. Soon, the so-called Y-Wing fighter became the most common craft in the Rebel arsenal.

As mentioned before, the BTL-A4 is the single-seat version of the BTL-B with the second crewmember replaced with an astromech droid. For power, the craft had a Novaldex power generator and Thiodyne 03-R cryogenic power cells. Two Koensayr R200 ion jet engines were attached to either side of a central spar. At the front end of each engine nacelles were domes which contain Fabritech ANx-y long-range sensor arrays, PA-9r long-range phased tachyon detection array and PG-7u short-range primary threat analysis grid. Hyperspace capacity was provided by a R300-H hyperdrive mounted at the rear of the spar. Armament comprised of a pair of forward-mounted Taim & Bak IX4 laser cannons, a pair of Arakyd Flex Tube proton torpedo launchers (with a payload of 8 Krupx GR7 proton torpedoes, or concussion missiles, ion torpedoes or proton bombs) and a pair of turret-mounted ArMek SW-4 or SW-5 ion cannons (as the BTL-A4 is a single seat craft, the cannon was usually fixed to fire forward or towards the rear). While factory-fresh Y-Wings featured armour plating around the engines the central spar, Rebel technicians stripped them off to ease maintenance.
As the Alliance's workhorse starfighter, the Y-Wing was involved in numerous minor and major engagements during the Galactic Civil War including the Battle of Scarif, Battle of Yavin, Battle of Endor and Battle of Jakku.
-----------------------------------------------------------
The Y-Wing design is based on a concept art by Ralph MacQuarrie. As with the X-Wing design, the attack fighter was given the name 'Y-Wing' due to its resemblance to the capital letter Y when viewed from above. The fighter's rough appearance was the vision of Joe Johnston who envisioned that the factory-spec fighters were chopped and stripped like a hot rod by Rebel technicians.
The Kit

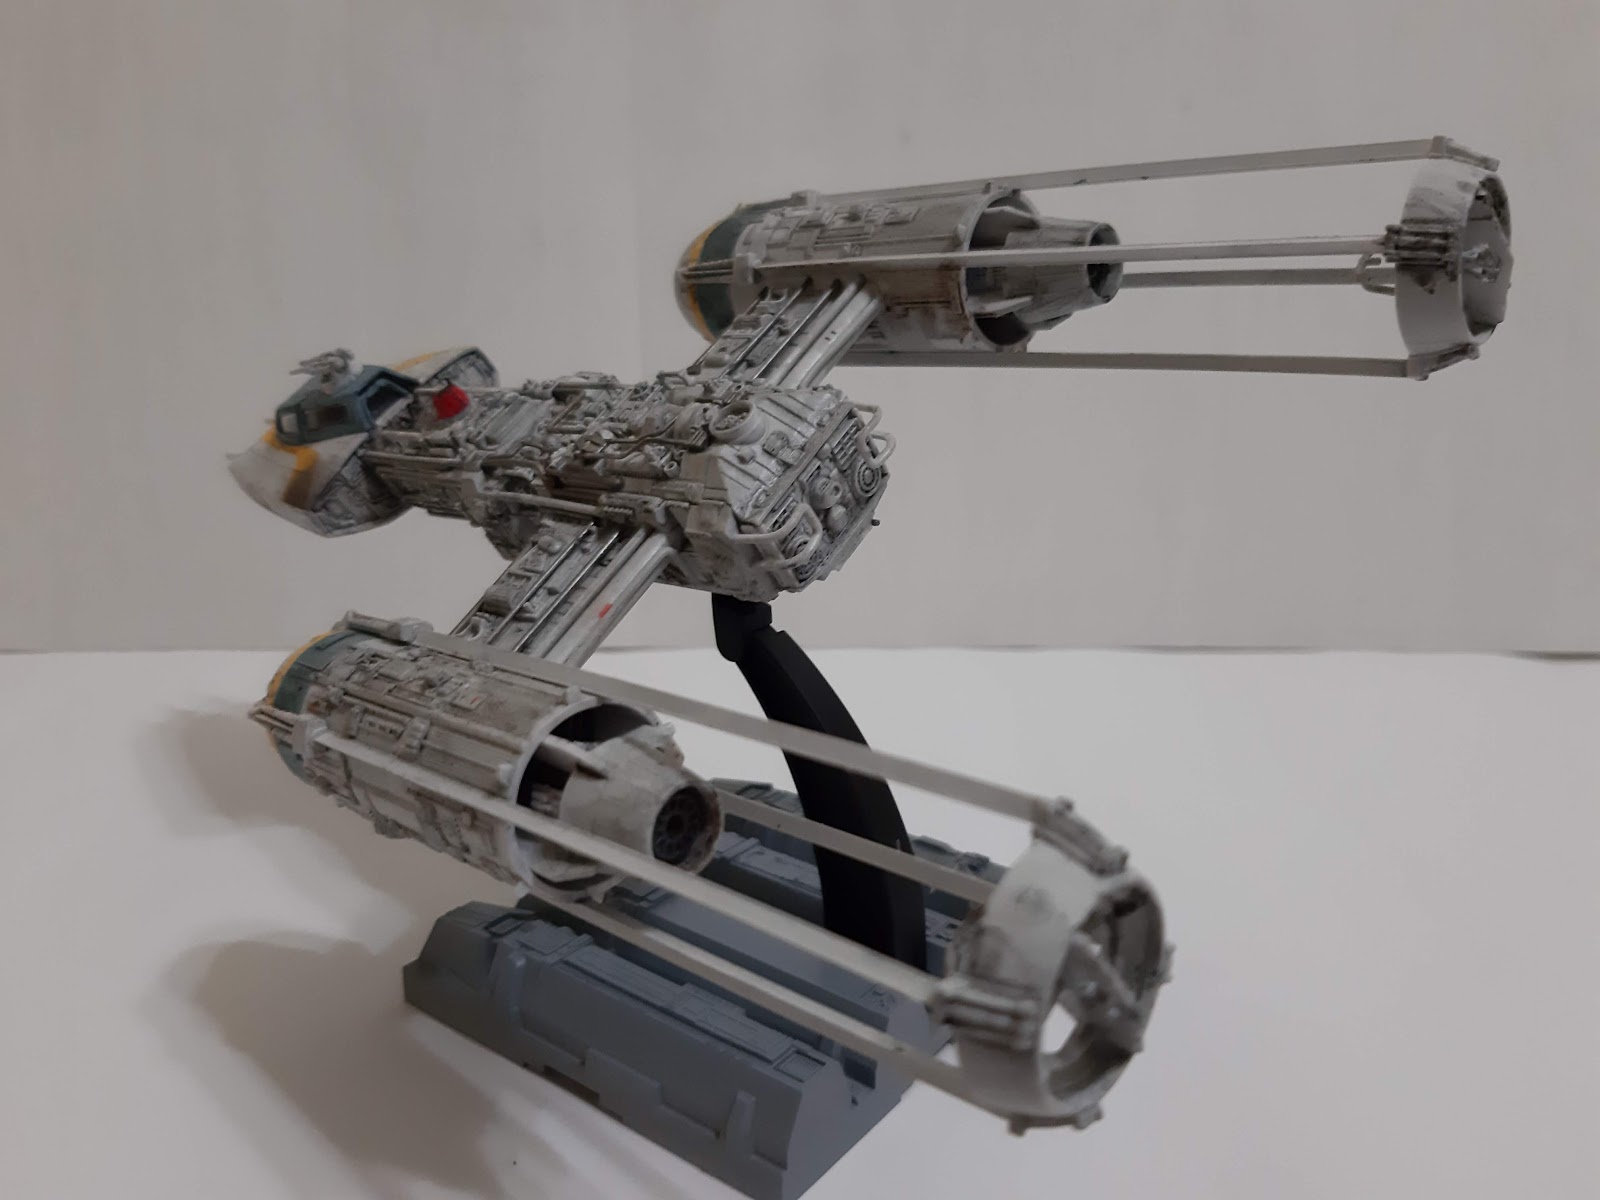
Bandai has been busy releasing kits of the Star Wars franchise vehicles and characters since acquiring the Star Wars licence from Disney.While I was quite skeptical before, all of the feelings were unfounded after building a number of their kits. The Y-Wing was released in 2015 and it featured all the hallmark of Bandai, including the multi-coloured sprue. The kit, as with most other Bandai Star Wars (or any other kit produced by them) is snap-fit but without the problems of old-style models of the same style of assembly. The raised details look very good and would benefit from washing process. As before, there are two types of canopies - one frames only without the glazing while the other is moulded in clear plastic. The latter can also be posed open. There were three pilot figures - one standing, the other two seated (one in the flight suit featured in Episode IV, the other in a suit featured in Episode VI). Two droids, an R2 and an R4 unit were also included. Markings were provided in decal and sticker form.
Construction

As usual with things that fly models, be it real or fictional, construction started at the pilot's 'office'. Although already moulded in black plastic, I painted it Vallejo Anthracite Gray as it looks more in-scale. The instrument and side panels can be painted as there are raised details. Alternatively, stickers or waterslide decals can be used after removing the said details. Too lazy to either paint or sand, I just apply the decals on the raised details. They however respond quite well to decal softening solution and that about covers it. The cannon barrels and the inside face of the coaming covering the barrel root were also painted before assembly. It should also be noted that the yellow trim seen on these ships in the movie was painted-on markings. Bandai however supplied them as a separate plastic piece, resulting in unnecessary panel line around it. The rear panel of the cockpit module include the rear cockpit transparency. This however is of the glazing-less type - fine if you want to use the frames-only canopy.
Construction then moved to the main fuselage. The moulding for this area is very nice and captures that rough, expeditionary feel of the original studio models. Also as a note of interest, the rear panel of the rear fuselage is a miniature of a Panther engine deck as used on the original studio model.The parts fit nicely with certain smaller parts need to be fitted to a larger part before being attached to the main body. Some parts didn't have positive 'snap-fitness' so I cemented them. The body of the astromech droid was painted but I didn't add any detail painting on it as it would be invisible inside the droid socket. I also didn't add most of the pipings seen on the surface of the rear fuselage as I think it would be better for me to add them after the fuselage has been painted.Also, due to some mis-handlings, the rail guards at the rear fuselage were bent. Anyway, just some gentle coaxing straightened them back.
Next up are the engine nacelles. Again the black-moulded parts were painted beforehand, this time with Burnt Iron. The nacelles are of multi-part assembly and some study of the assembly guide is needed to avoid mistakes. I painted the strip behind the sensor domes USAF Blue Grey (FS 32537) before adding the long, thin booms. As adding the thrust vanes at the end of the boom involved some fiddly handling, they were cemented (the glue, apart from securing the vane to the boom, also allow some friction allowing easier handling, at least to me!). Parts A5, A10 and B23 which are the landing gear doors, were also cemented as they did not securely fit into their slots plus I usually have my Star Wars models in flying pose. A piece of clear acetate was cut to shape and stuck to rear cockpit glazing while the central section of the canopy had the tab (to allow it to be posed open) was cut. With that, the model is off to the paint shop. .
Painting and Decalling
Bandai's painting instructions are pretty generic and did not specify any particular brand. Browsing the internet, I came to the conclusion that USAF Light Gray (FS 36495) is the best colour. I used Vallejo 71.276 but added some variations. The exposed fuselage and the engine were painted 'neat' while the forward compartment and the sensor domes have the light gray added with white. I then checked with my Star Wars reference books on the colours of the pipings. The
Star Wars Archive shows that the models used in filming have the same colour as the fuselage while the drawings in
Star Wars Vehicles show them to be of a different colour. Diverging from erm, 'Canon' into 'Legends' the pipings were painted differently - some FS 36495, while others in Gunze Iron 2 and a mix of Gunze Brass and Silver. The canopy frames were painted the Tamiya mix for US BLUe Gray but somehow they were too dark for my liking - I lightened it up further with more Flat White. The few decals present were then applied as per the usual method. I intended the Y-Wing to be a rather generic Gold Squadron craft that took part in the Battles of Yavin and Scarif as depicted in the movies. So, the rather distinctive 'burn marks' were not added, just some 'carbon deposits' using Tamiya Weathering Master 'Soot'..
Finishing

I started by adding the engine nacelles to the rear fuselage. Again, no gluing is necessary here. Afterwards, the pipings for the rear fuselage were added. They mostly went in without problem but some locating holes were apparently too small requiring a bit of surgery either to the hole or the rod. There are quite a lot of them and I took several sessions to finish them ( I am a bit slower of late!). The work went slower when one of them broke and had to be repaired. The pilot figure was painted and then placed inside the cockpit. Since it was added after the cockpit had been completed, it was nearly impossible to fit his legs and so the legs were amputated at shin level. It also needed to be cemented to the seat as there are no tab-and-locating hole as with other the other kits. The canopy was put in place and I found that there is a gap between the rearmost canopy panel and the rear transparency. The model then received a wash with heavier application being done on the rear fuselage and the engine modules. For the astromech droid, I chose the R5 to add a bit more splash of colour. The whole model was then sprayed with Mr. Hobby Topcoat Flat Clear to finish.
Conclusion
The geek in me continue to be awed by the range of Star Wars kits from Bandai. The details are well done while the construction is quite a snap (pun intended). My only comment with the kit was the rather disappointing fit of the pipings but the again, it might be just me. Anyway, building it was a breeze and allowed me to have a peace of mind before heading back into building another 500+ parts kit . Oh I forgot to mention about the turbolaser turret included in the
A-Wing kit. It remain unbuild as I intended to display it together with the Y-Wing and an upcoming T-65 X-Wing fighter.


No comments:
Post a Comment