The P-47 was developed from Republic's earlier P-43 Lancer and (as Seversky Aircraft Company), the P-35. The P-43 had a short production run and Republic worked on a better aircarft, designated P-44 rocket and another aircraft designated the AP-10. The latter was a lightweight fighter powered by a liquid-cooled Allison V-1710 engine and armed with eight 12.7mm machine guns. The US Army Air Corps took interest in the project and gave it the designation XP-47. With the war escalating in Europe in Spring 1940, both Republic and the USAAC concluded that both the XP-44 and XP-47 were inferior to German fighters and Republic unsuccessfully attempted to improve the design as XP-47A. Alexander Kartveli, Republic's aircraft designer however came up with an all-new design which the USAAC ordered in September 1940 as the XP-47B.
The XP-47B was larger than the original XP-47, with an empty weight of 9,900lb. It was powered by the air-cooled Pratt & Whitney R-2800 Double Wasp engine driving a Curtiss Electric propeller 3.7m in diameter. Rather than close-cowling the engine, Kartveli opted a rather large, 'horse-collar'-shaped ellipse. The cowling admitted cooling air for the engine, oil coolers and the turbosupercharger intercooler system. The complicated system, along with its ducts gave the XP-47B a deep fuselage and the wings mounted relatively high. It was armed with eight 12.7mm Browning M2 machine guns in the wings. The P-47B however had a number of problems and as a result, only 171 were ordered. The USAAF however considered that the P-47 was eorthwhile and ordered 602 of the improved P-47C, which started delivery in September 1942. With most of the troubles gone, the 56th Fighter Group with their P-47s was sent to Europe to join the Eighth Air Force.
Refinements of the P-47 continued with the P-47D, which was also the most-produced variant with 12,602 built. The 'D' were built in evolving production blocks, each incoroprating subtle changes from the earlier ones. Beginning from Block 22, larger-blade propellers were installed with the original Farmingdale, Long Island plant (whose aircraft were identified with the 'RE' suffix after the block number) using 4.01m diameter Hamilton Standard prop and the second plant at Evansville, Indiana ('RA' suffix) using a 3.96m diameter Curtiss Electric prop. Up to this block, all Thunderbolts were of the 'razorback' canopy configuration with a tall fuselage spine behind the pilot, resulting in a 20d blind spot to the rear. To overcome this problem, the RAF (which also used the Thunderbolt) devised the so-called 'bubble canopy' for its Hawker Typhoons. The Americans took note of this and along with increased fuel capacity, resulted in Block 25 of the P-47D. The cutting of the spine however resulted in yaw instability and a dorsal fin extension was fitted to Block 40 aircraft. Two other versions saw service during the war - the 'hot rod' P-47M and the long-range P-47N, built specifically for the Pacific theatre.
The P-47, nicknamed 'Jug' because of its fuselage's similarity to a milk jug, took their first combat mission on 10 March 1943. It scored it's first kill when Major Don Blakeslee of the 4th Fighter Group shot down a Fw 190 on 15 April 1943. Despite being replaced as the primary escort fighter by the P-51 Mustang, the Jugs still claimed 3,752 air-to-air kills. During the course of the war, they gradually became the most important USAAF ground-attack aircraft, armed with the built-in machine guns, 500lb or 1,000lb bombs, and 4.5in and 5in HVARs. Jug pilots claimed the destruction of 86,000 railroad cars, 9,000 locomotives, 6,000 armoured fighting vehicles and 68,000 trucks from 6 June 1944 through 8 May 1945. The P-47 also served with other Allied nations such as Brazil, Mexico and France.
The Kit
Okay, it's a 21st Century Tamiya kit - very good fit, gorgeous details and ease of construction. The cockpit is well-detailed and there is no ned to substitute it with aftermarket resin (you might want to spend money for a PE seatbelt though). The engine is also very nice with correct details. Some parts have alternatives in order to depict the marking options of the kit. This include Hamilton Standard and Curtiss Electric props (also included is the earlier skinny Curtiss Electric prop blade of the P-47C) and two different gunsights. The decking behind the cockpit is separate, allowing Tamiya to make a kit of a 'finned' aircraft (eventually released as the P-47M). For underwing stores, Tamiya provided two 150-gal tanks (appropriate for Mediterranean and Pacific theatres), two 108-gal 'paper' tanks (suitable for Europe) and a 150-gal 'flat' tank. Ordnance consists of two 500-lb bombs and two 'bazooka' type 4.5in rocket launchers.
Markings are provided for two planes: WZ-P, Lt. Col. Benjamin Mayo, 84th FS, 78th FG, Duxford 1944 (why Tamiya chose this rather bland marking instead of Lt. Col. Mayo's 'other', P-47, MX-X / 'No Guts No Glory!' is beyond me) and VM-P / 'Kokomo', Maj. Gen. William Kepner, 551FTS, 495FTG, Mount Farm Airbase, Autumn 1944. Maj. Gen. Kepner was VIII Fighter Command's commander and his aircraft had only six machine guns and was not equipped to carry underwing stores. The instruction sheet indicates this on the relevant construction steps. Both aircraft are in natural metal with black (for WZ-P) and pale green (VM-P) anti-glare panels. Also included in the decal sheet are 'invasion stripes' to help those who are 'invasion stripe-challenged' (such as myself!)
Construction
The cockpit was assembled first, as usual. Looking at the instructions, I was perplexed - the instructions have you paint the cockpit interior in XF-5 Flat Green instead of Tamiya's recipe for Zinc Chromate. Browsing around the internet, I found that the instructions was correct (more or less) as Republic did not paint the interior Zinc Chromate. The parts were painted prior to assembly, leaving the contact surfaces unpainted. The detail parts were painted their respective colours (Buff, Red, Red Brown, Silver, Aluminium and Black) using Tamiya acrylics. The cockpit was then assembled and put aside. The next step was assembling the fuselage. Before closing off the fuselage, Parts A1 and A7 were glued together at they will act as the 'spars' for the wings and also the rear of the main wheel wells. Part B18 (part of the supercharger I guess) was painted slightly differently. The instructions told you to mix XF-56 Metallic Grey with XF-7 Flat Red. I painted the part Gunze 8 Silver and later add a bit of X-27 Clear Red. The fuselage halves were then mated and the engine firewall glued to the assembly. The rear decking was also added at this stage. There is however a very slight fit problem here but was easily overcame with putty.
I skipped Step 4 (engine assembly) and go straight to Step 5. The horizontal stablisers were attached with no problem. I also attached the rudder at this stage instead of Stage 7. For the supercharger air outlet, I chose the closed position . Next, the wings. I decided to arm my model with ground attack ordnance and the respective holes were drilled. The panel for the machine gun barrels were glued and the wings were attached to the fuselage. I then return to Step 4 and assemble the engine and its cowling, which I chose the open position. The flaps were also added to the model and chose the 'up' position - visually it is less appealing but more correct. While all this was happening, I broke the gunsight, which however were only went inside the forward fuselage and quickly recovered. I put it aside to prevent further damage. And it was off to the paint shed.
Painting and decaling
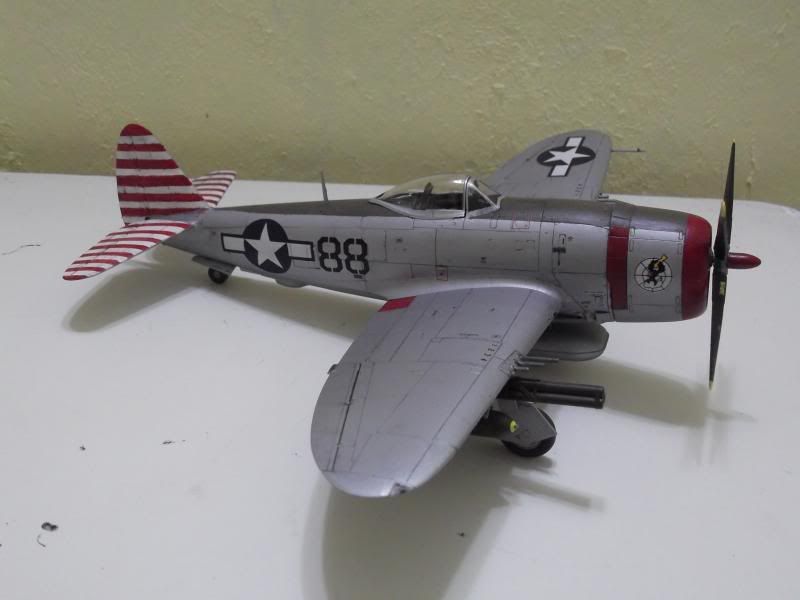
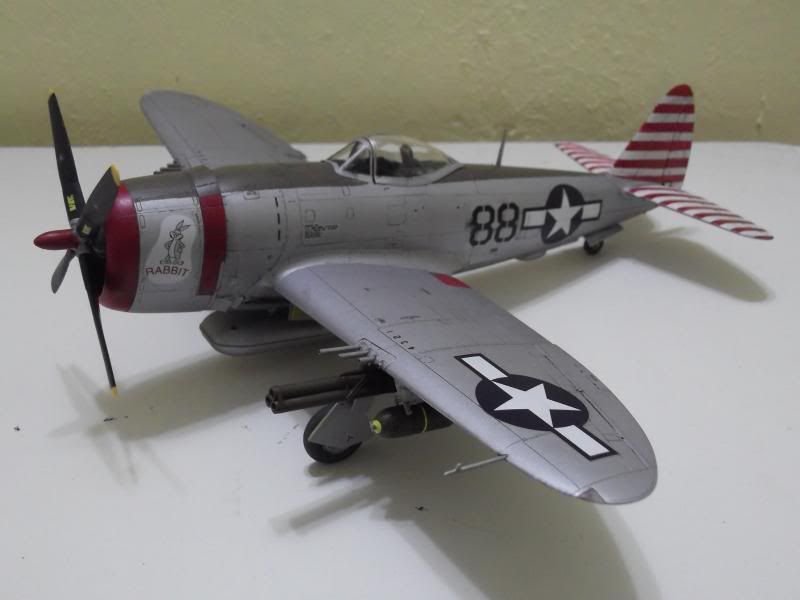
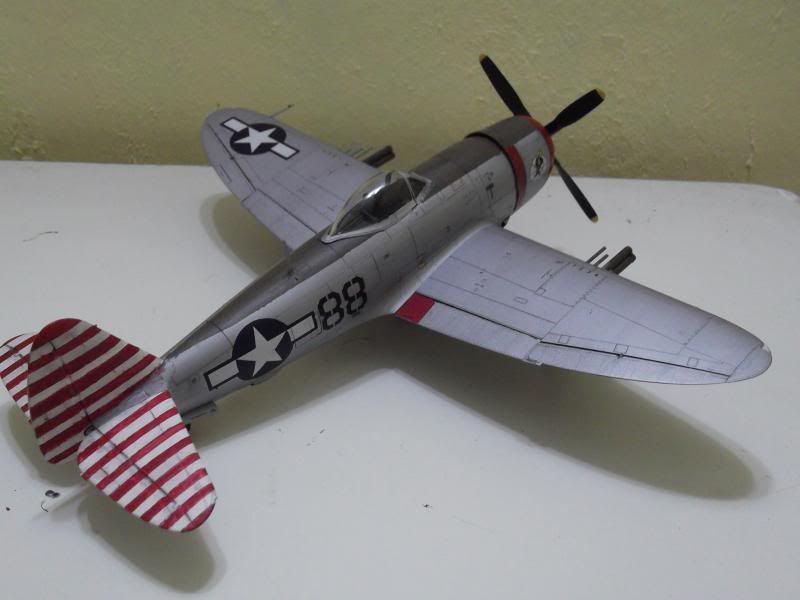
I decided not to do any of the kit markings. Rummaging through my stash box, I found leftover decals from my earlier Academy 1/48 P-47. Since the Academy kit was built as Lt. Frank Oiler's 'Eileen', this model would be 'Rabbit', a P-47 belonging to the 527th FS, 86th FG, based at Pisa, Italy in 1944. I however have lost the decals for the stripes on the horizontal tails and to avoid any discrepancies in colour shades, I decided to paint the stripes. I first sprayed Tamiya TS-27 Flat White over the vertical and horizontal tails. Once dry, the surfaces were masked - I used the decals for the vertical tail and photos of completed models on the internet for horizontal tail as guides for masking, yeah, very sloppy but that's what I did. The red stripes were painted Tamiya X-7 Red (I have run out of XF-7 Flat Red). Once the masks were lifted, I found that there was a bad case of seepage and that the stripes were not uniform! The seepage was fixed using Tamiya XF-2 Flat White. As for the irregularity of the stripes, I read somewhere that the stripes were painted by the 86th ground staff and that neatness is of secondary importance, so there! The cowling flaps and cowl ring were also painted X-7. Once completely cured, the painted parts were masked off and I sprayed Tamiya AS-12 Bare Metal Silver on the model. Once dry, the masks were taken off and I touched up a bit of oversprays using XF-4 Yellow Green, X-7 and XF-2 where applicable. Before decaling I painted the anti-glare panel olive drab using Tamiya XF-62.
The Academy decals were old, I think I bought the kit some time in 2002. They hadn't yellowed but their integrity was suspect. I chose an unused piece and it broke when I put it in water. The best solution is to apply liquid decal film but since it was unavailable to me, I test-sprayed Tamiya TS-79 and apparently it worked. Satisfied, I sprayed it over the relevant decals. Then it was time to apply the decals. I worked front-to-rear, port-to-starboard. The 'Rabbit' nose art actually broke despite the layer of clear paint but fortunately it was salvageable. The decal however is quite translucent unlike the 527th insignia on the starboard side. Decals for number '88' went on the kit without a hitch. Kit decals were use for the rest of the kit except for the starboard national insignia. The Tamiya decal options have extra large insignia for the starboard wing, which I believe was not applied to 'Rabbit'. Fortunately, I have leftover decals from a Tamiya F4U-1A, which of the same size as a regular insignia applied to a Jug. It has yellowed a bit, but since it was applied to the underneath of the wings, it was of no great concern to me. The decals were then subjected to Mr Mark Softer treatment but the kit decals seemed to be a bit resistant to it.
Finishing
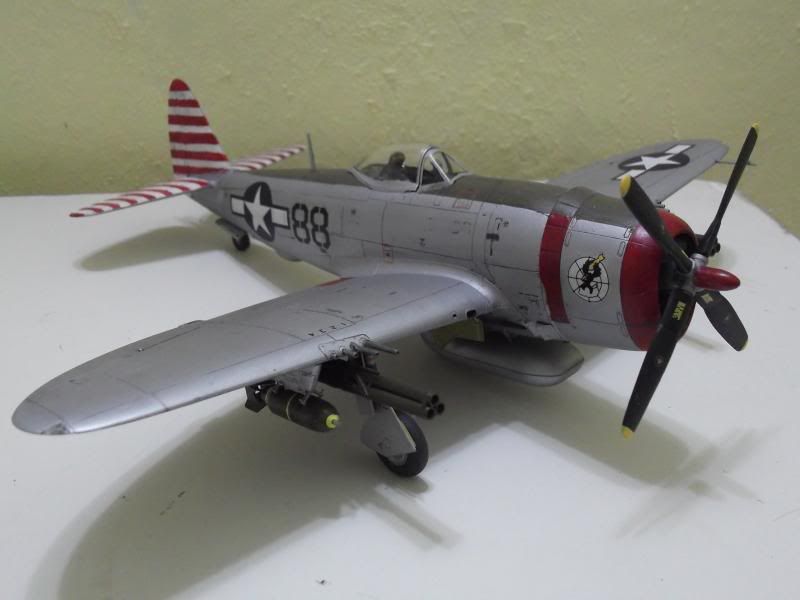
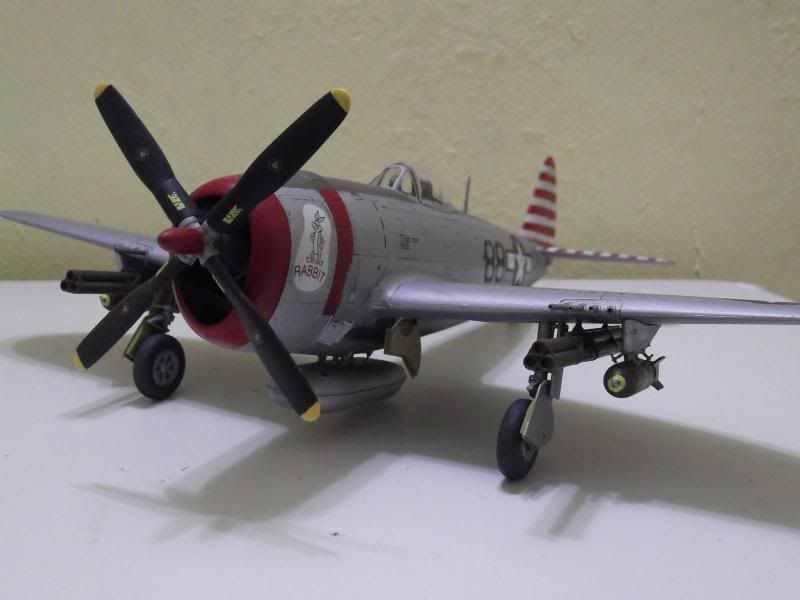
The remaining parts can now be attached to the model. I started by adding the underfuselage pylon, carefully, as it was a tight fit and followed by the underwing pylons and the 'flat' drop tank. The landing gears were then attached. For the mainwheels however, I used the spoked wheels rather than the solid disc specified for the kit markings. This was followed by the machine gun barrels and the ground attack ordnance. As for the propeller, I was at a quandary - the only illustration of 'Rabbit' (and there was no photo whatsoever) shows that it was equipped with Curtiss Electric propeller; the description mentioned that it was a Block 25 RE, meaning that it should be equipped with a Hamilton Standard prop. I settled for the Curtiss Electric prop eventually. The spinner was painted X-7 Red. Finally the aerial mast and the canopy was installed. I could not fit the sliding portion of the canopy properly however. Considering Tamiya's engineering, I guess it was me then. I sprayed Tamiya TS-79 Flat Clear to seal everything but it end up looking too dull, so I sprayed TS-80 Semi-Gloss Clear on the bare metal parts.
Conclusion
As usual with Tamiya kits, when you open the box, toss in some cement, close the box, give it a vigorous shaking out come a compeleted model. Ok, maybe not like that but their kits, including this Thunderbolt, are among the most accurate and have the best buildability in the market. The choice of markings may be a bit disappointing as there are a lot of interesting P-47 markings during the war. But then, there are plenty of aftermarket decal sheets to choose from.