Historical Background
Buoyed by the success of the biplane Fiat CR.32 Freccias of the Aviación Nacional and Aviazione Legionaria during the Spanish Civil War, Fiat proposed to the Regia Aeronautica a more advanced fighter based around the 840-hp Fiat A.71R1C.38 air-cooled radial engine and of a clean, robust sesquiplane (unequal span biplane) design. Despite the biplane configuration, the new CR.42 was of a 'modern' design based on a strong steel and alloy frame incorporating a NACA cowling for the engine with fairings covering its fixed landing gear. The CR.42 also proved to be agile, thanks to its low wing loading although it lacked pilot armour and radio. During evaluation, the CR.42 was piited against the Caproni Ca.165, another biplane design with higher speed at the cost of maneuverability. The Falco was eventually picked for series production as it was judged superior in terms of maneuverability - a performance indicator for fighter aircraft of the first- and second-generation but were increasingly secondary for modern monoplanes. The Fiat CR.42 Falco entered service in May 1939 and despite the general obsolescence of biplanes, about 300 had been delivered to the Regia Aeronautica by the time Italy entered the war. It also enjoyed export success, being purchased by Hungary, Belgium and Sweden. The Luftwaffe also took over some ex-Regia Aeronautica CR.42s following the Italian Armistice and later ordered 200 CR.42LW (Luftwaffe) for use in night harassment and anti-partisan roles.
In combat the Falco was unable to operate effectively against modern opposition, relying heavily on its maneuverability and the skills of its pilot to survive. Over the skies of Northern and East Africa, the fight was more or less equal against the opposition's bomber and recon planes and also against the Gloster Gladiator, the RAF's last biplane fighter. Even when pitted against the Hurricane and Spitfire at the abovementioned theatre and also during the Battle Of Britain, the Falco can still hold its own. Even the Belgian Falchi managed to score victory over the vaunted Messerschmitt Bf 109. Eventually however, like when facing the agile Japanese Zero, the best way to combat a CR.42 is by using the slashing attack rather than getting into a maneuvering combat. Faced with the change in the enemy's tactics and its own increasing obsolescence, the CR.42s were progressively withdrawn from fighter units and were re-assigned to attack units. The attack (or assalto) version of the Falco can carry bombs of up to 220lb under each wing.
The Kit
Classic Airframes is an American company renowned for producing limited-run models of aircraft that mainstream manufacturers tend to overlook, such as the British Defiant and Whirlwind. The CR.42AS kit is Classic Airframes' third CR.42 kit following their earlier release of the CR.42 fighter and CR.42 export version. The kit actually allows one to build the Assalto as well as Africa Settentrionale (North Africa = 'tropicalised' i.e fitted with sand filter). So with aftermarket decals, one can also build an assalto with or without the filter or a standard fighter with the filter.
The kit is of mixed-media type. The plastic parts was made from low-pressure ejection styrene but have good engraved and 'fabric' details. Being a short-run kit, the parts do not have locating pins. The resin parts consisted of the engine, some cockpit parts, exhausts (including extended exhausts for the Luftwaffe option), bomb racks and the bombs themselves. There were also two PE frets, made by Eduard, one of them in colour. The windshield was made of clear styrene, and not vacform (thank goodness!) Markings are provided for four aircraft. The instructions came from the earlier CR.42 kits and an additional sheet was included to show the steps for the AS version. There is also a photo of a completed cockpit to help in assembly. Decals were provided for four aircraft:
- Scuola Caccia d'Assalto, Ravenna circa 1942.
- Sezione Autonoma Collegamenti, Rome-Centocello, c. 1945-1946
- 15° Stormo d'Assalto, Barce, Cyrenaica c. 1942
- 2./Nachtschlachtgruppe (NSGr) 9, Turin-Aeritalia c. 1944
I then attached the lower wings, which is in one piece. Generally, fit is good except for the front, which received a bit of attention from Tamiya Putty. The horizontal tails were next and there is also a bit of fit issue here. I then turned my attention to engine. CA made really beautiful mould of the engine which consists of the crankcase and separate cylinders. From what I read in modeling magazines, CA resin engines did not fit inside their cowling but in this case, after assembling the cylinders to the crankcase and dry-fitting the cowling, the assembly fit perfectly. The crankcase was then painted XF-53 Neutral Grey and the cylinders Mr. Color 28 Steel and drybrushed Mr. Color 8 Silver. Afterwards, the PE rocker arms were superlgued to the front of the engine and then engine assembly was mounted to the airframe. For this, CA provided a positive mounting which sat the engine correctly. The sand filter was then attached to the cowling.
Now comes the rather hard part - mounting the upper wing. To help in this step, I taped the upper wing face (or the 'up' side) down on my working table. The model was then aligned over the upper wing and made level using plasticene. I worked inside-out, starting with the innermost cabane struts. CA however got their drawings wrong for the innermost cabane struts - it should be in the normal 'v' position instead of inverted. Suffice to say it took a lot of patience to assemble the struts but in the end I got it done. I also rigged the outermost struts but instead of using fishing lines (as with my I-153 built) I used copper wire and since I got a bit jaded after assembling the struts, I simply measure, cut and superglue the wire into position instead of drilling locator holes. The result? Sloppy, un-tensioned wires! The landing gears were the last part assembled prior to painting. Construction was straightforward. CA have the tyres with flat moulded in. It however looked like a flat tyre rather than tyres being compressed by weight! Unlike previous builts, I added the tiny parts, such as the flying control horns at this stage.
Finishing
To finish the model, I glued on the remaining parts. The propeller blades were painted XF-1 Flat Black on the inside faces and XF-16 Flat Aluminium on the outside and put on the decal for the manufacturer's label. The bomb racks were next and I had to resort to internet photos as there were no location markers for them. One of the bombs however has its tail broken as a result of clumsy sawing. The bomb was superglued back onto the pouring stub (at the broken area only) and then carefully cut again The bombs were painted XF-61 Dark Green and glued onto the racks. The whole of the model were then sprayed with Flat Clear.
Conclusion
The CR.42 was both my second biplane and Classic Airframes kit. The first was a Polikarpov I-153 Chaika which was also an earlier CA release. The CR.42 showed advances made by CA over the years despite being a limited-release modeling company. The resin parts are first-rate and so were the PE and the decals. The plastic parts, especially the fuselage were rather thick but it should be easy to overcome with dilligence. CA should be congratulated for producing the kit of one of the last fighter biplanes in service and to think of it, of the last biplane fighters in World War 2 (Gloster Gladiator, Polikarpov I-153, Fiat CR.42 and Avia B.534), models of two of them were made by CA.
The Kit
Classic Airframes is an American company renowned for producing limited-run models of aircraft that mainstream manufacturers tend to overlook, such as the British Defiant and Whirlwind. The CR.42AS kit is Classic Airframes' third CR.42 kit following their earlier release of the CR.42 fighter and CR.42 export version. The kit actually allows one to build the Assalto as well as Africa Settentrionale (North Africa = 'tropicalised' i.e fitted with sand filter). So with aftermarket decals, one can also build an assalto with or without the filter or a standard fighter with the filter.
The kit is of mixed-media type. The plastic parts was made from low-pressure ejection styrene but have good engraved and 'fabric' details. Being a short-run kit, the parts do not have locating pins. The resin parts consisted of the engine, some cockpit parts, exhausts (including extended exhausts for the Luftwaffe option), bomb racks and the bombs themselves. There were also two PE frets, made by Eduard, one of them in colour. The windshield was made of clear styrene, and not vacform (thank goodness!) Markings are provided for four aircraft. The instructions came from the earlier CR.42 kits and an additional sheet was included to show the steps for the AS version. There is also a photo of a completed cockpit to help in assembly. Decals were provided for four aircraft:
- Scuola Caccia d'Assalto, Ravenna circa 1942.
- Sezione Autonoma Collegamenti, Rome-Centocello, c. 1945-1946
- 15° Stormo d'Assalto, Barce, Cyrenaica c. 1942
- 2./Nachtschlachtgruppe (NSGr) 9, Turin-Aeritalia c. 1944
Construction
The cockpit assembly is made up from resin and PE. Construction looks straightforward and the enclosed xeroxed photo helps (and if the photo is not clear enough, there are clear, coloured copies on the internet). Dry-fitting showed that the cockpit floor is too wide so the first order of business was to sand down the edges until it fits nicely between the cockpit halves. To help with assembly, I decided to build the cockpit from the centre outwards.I painted the interior Grigio Anticorossivo using Gunze H308 Light Grey. The rather difficult area is concerned with the PE parts especially those forming the delicate cockpit frame. Extra care was needed here to avoid distorting the cockpit frame through brute force or sheer carelessness. One half of the PE fret is in colour, which includes the seat belt and harness, cockpit instrumentation and side console, and they look beautiful. The two-part PE instrument panels were stuck together using Tamiya X-22 Gloss Clear and the assembly was glued together with the PE gunsight mounting on their places. The cockpit assembly was then glued to one half of the fuselage and then both fuselage halves were glued together.I then attached the lower wings, which is in one piece. Generally, fit is good except for the front, which received a bit of attention from Tamiya Putty. The horizontal tails were next and there is also a bit of fit issue here. I then turned my attention to engine. CA made really beautiful mould of the engine which consists of the crankcase and separate cylinders. From what I read in modeling magazines, CA resin engines did not fit inside their cowling but in this case, after assembling the cylinders to the crankcase and dry-fitting the cowling, the assembly fit perfectly. The crankcase was then painted XF-53 Neutral Grey and the cylinders Mr. Color 28 Steel and drybrushed Mr. Color 8 Silver. Afterwards, the PE rocker arms were superlgued to the front of the engine and then engine assembly was mounted to the airframe. For this, CA provided a positive mounting which sat the engine correctly. The sand filter was then attached to the cowling.
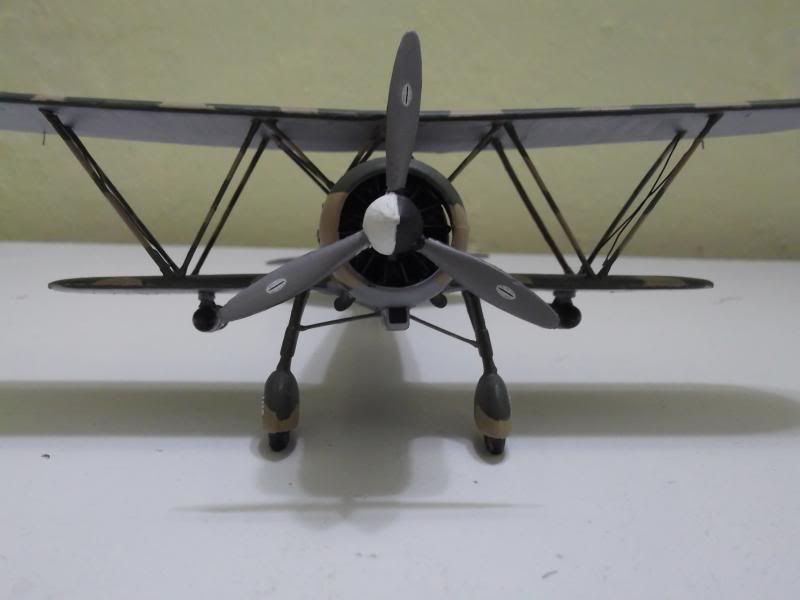
Now comes the rather hard part - mounting the upper wing. To help in this step, I taped the upper wing face (or the 'up' side) down on my working table. The model was then aligned over the upper wing and made level using plasticene. I worked inside-out, starting with the innermost cabane struts. CA however got their drawings wrong for the innermost cabane struts - it should be in the normal 'v' position instead of inverted. Suffice to say it took a lot of patience to assemble the struts but in the end I got it done. I also rigged the outermost struts but instead of using fishing lines (as with my I-153 built) I used copper wire and since I got a bit jaded after assembling the struts, I simply measure, cut and superglue the wire into position instead of drilling locator holes. The result? Sloppy, un-tensioned wires! The landing gears were the last part assembled prior to painting. Construction was straightforward. CA have the tyres with flat moulded in. It however looked like a flat tyre rather than tyres being compressed by weight! Unlike previous builts, I added the tiny parts, such as the flying control horns at this stage.
Painting and Decaling
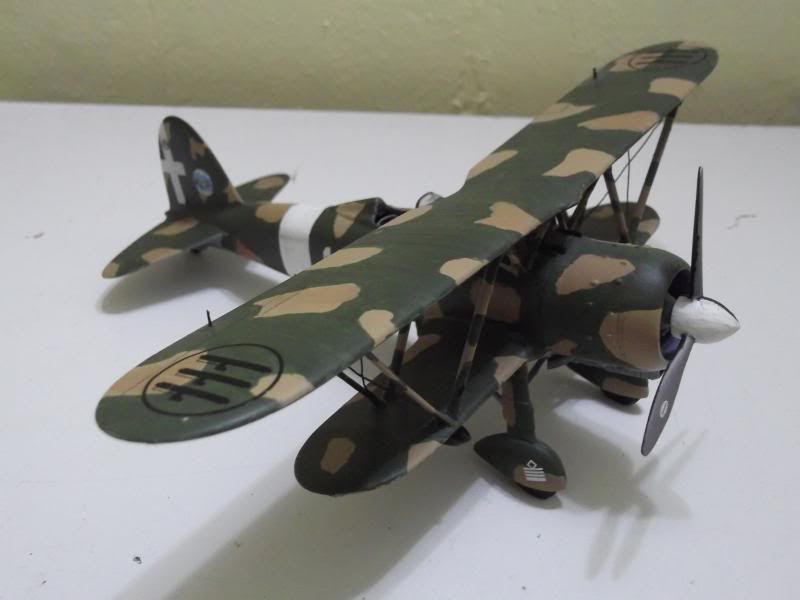
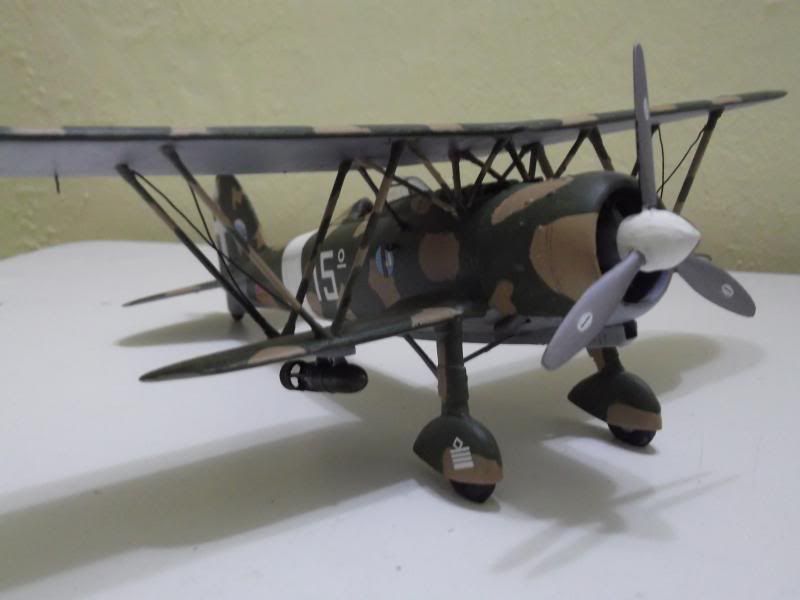
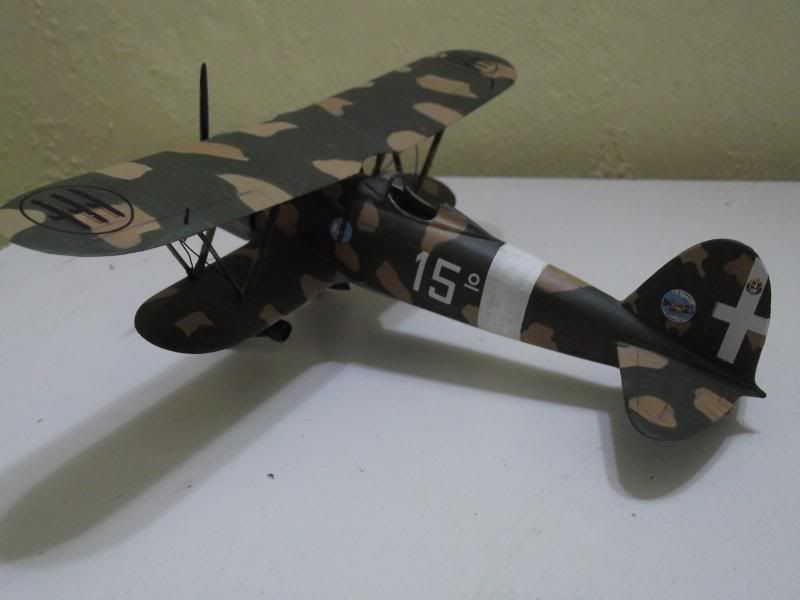
I should mention that the decision for marking options should be made before construction began as the options feature different details (the Luftwaffe Falco has extended exhausts and no wheel spats, two other options have partial wheel covers, for example). I chose the markings for 15° Stormo d'Assalto. Of so-called 'lizard' scheme, it consists of Grigio Azzurro Chiaro bottom and Verde Olivia Scuro upper with large blotches of Giallo 3 over the green. I used Tamiya XF-66 Light Grey and XF-2 Flat White for Grigio Azzurro Chiaro, Tamiya XF-67 NATO Green for the Verde Olivia Scuro and XF-59 Desert Yellow for the Giallo 3. The fuselage band was painted XF-2 Flat White. Once dry, I started putting on the decals. The decals were made by Microscale - thin and in good register. All the decals were then subjected to the usual Mr Mark Softer treatment.Finishing
To finish the model, I glued on the remaining parts. The propeller blades were painted XF-1 Flat Black on the inside faces and XF-16 Flat Aluminium on the outside and put on the decal for the manufacturer's label. The bomb racks were next and I had to resort to internet photos as there were no location markers for them. One of the bombs however has its tail broken as a result of clumsy sawing. The bomb was superglued back onto the pouring stub (at the broken area only) and then carefully cut again The bombs were painted XF-61 Dark Green and glued onto the racks. The whole of the model were then sprayed with Flat Clear.
Conclusion


No comments:
Post a Comment